Filete de pescado entomatado (Fish filets in spicy creole sauce!)

4 Jun

In the supermarket the other day, Leandro asked for fish for lunch. This is not in itself odd…everyone in this family is island-born somehow, we all love fish, and he is a huge fan of River Monsters on Animal Planet (which I strongly encourage, because I think Jeremy – the mad fisherman — is quite hot and much better to watch with my son than Diego the animal rescuer – why, why, why do he and his bloody cousin, Dora the Explorer, have to shout everything they say? –  or Phineas and Ferb – who are quite sweet, but not nearly as compelling as flesh and blood Jeremy and his sunburnt, craggy-faced, understated British delivery, rod-wielding self ).

So I picked up some wild caught tilapia to accommodate him, and because I suddenly got a strong craving (antojo) for fish in salsa criolla.

Fortunately, I had all the ingredients in – aside from the fish, it’s a pantry dish, and double fortunately, Leandro loved it, so happy, happy! Triple fortunately, it can be adapted to chicken and shrimp too, so keep that in mind! I’m happy, hope you’re happy too…

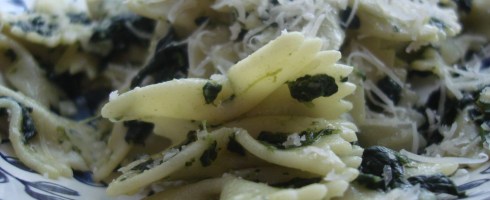
I served it with spinach pasta, on the boy’s request…I definitely would have preferred polenta, but who has time for that at 1 p.m. with no lunch ready?

Filete de pescado entomatado (Fish filets in spicy creole sauce)

1 Tbs extra virgin olive oil

1 medium onion, chopped

3 cloves garlic, minced

½ Cup roasted red peppers (yellow or green are fine too!)

Pinch hot red pepper flakes, optional

8 oz can Spanish-style tomato sauce

8-10 pimiento-stuffed green olives, sliced

1 generous tsp capers, drained indifferently

½ -1 lb tilapia filets (or other flat whitefish)

Salt and pepper to taste

Heat olive oil in a large sauce pan at medium high until liquid and fragrant. Add onions, stir to coat, and lower heat to medium. After five minutes, add garlic and peppers and pepper flakes, if desired. Cook an additional 5 minutes, until vegetables are tender, then add tomato sauce, olives and capers and cook at a lively simmer for 10 minutes.

Meanwhile, lightly salt and pepper tilapia filets on both sides. When sauce has cooked until the oil is beginning to separate from the sauce, lay filets on the sauce without filets touching one another.

Cook for about 4 minutes, then turn filets carefully (they will fall apart if you are not careful) and cover with sauce, cooking another 4 minutes or so (check for doneness – opaque flesh – with a fork). The genius of this recipe is that the fish won’t dry out if overcooked!

Serve with rice or atop polenta.

Radish Revelation x 2: Roasted Roots and Sauteed Greens

30 May

We are eating from the garden! We are eating from the garden!

I cannot tell you how pleased we are with the French Breakfast radishes. No, we are not eating them for breakfast. No, we do not have any desire to suddenly become French (although a pied a terre in Paris or a cottage in the South of France would be very nice, thank you).

But the French Breakfast radishes? This little piggy said “Oui, oui, oui!” all the way home.

They are the easiest thing ever to plant and grow, don’t mind being crowded, move fast (like less than four weeks to edibility) and  are easy for a preschooler with no patience and limited fine motor skills to harvest.

Because we are pulling them out of the ground, and not out of a little plastic pouch, we also get the radish greens, so today’s blog is a double feature. You can use the whole thing (well, I do cut off the stringy rooty bit)!

However, because we pull them out of the ground, they are very, very dirty. In fact, I just found out that rather than harvest lettuce from the garden, my dad has still been buying clamshells of mixed greens from the store, “because I don’t feel like cleaning all that dirt….”

Seriously.

Let me just move on from that one and say, if you are willing to deal with the dirt (you may want to hose them down over the garden bed so you don’t lose all that good soil), the freshness of these radishes is amazing. And the sweetness that comes out in roasting is astonishing. The greens are great too, in the way that all leafy greens are great (to me). Saute with garlic and love them up. So here are your two recipes for the the same veg. Rock on!

(Full disclosure: my darling son – who planted, watered, thinned and harvested these with his own hammy little hands –  tried a bite of the roasted ones and spit them out. Whatever. More for me.)

Roasted Radishes

20-30 radish bulbs, topped and tailed (radish greens can be reserved and used for salad or sautéed with oil and garlic), and sliced in half

1 Tbs extra virgin olive oil

1 Tbs salted butter (or 1 Tbs unsalted butter and a sprinkle of salt)

1 -2 tsp fresh lemon juice

Preheat oven to 450°F.

Place radishes on a rimmed baking dish (lined with foil if you prefer). Smother with remaining ingredients and roast for 15-20 minutes or until browning at the edges. Sprinkle with additional salt, if desired. Serve.

Sauteed Radish Greens

1 -2 Tbs extra virgin olive oil

Three cloves garlic, minced

Radish greens from 20-30 young radishes, thoroughly rinsed and dried, stems removed, if desired

Salt to taste

Heat olive oil in sauté pan at medium high until liquid and fragrant. Add garlic, lower heat and cook for one minute or longer – until lightly golden. Add radish greens and stir to coat. Cook at medium heat until bright green and wilted. Serve on its own, or as an addition to a sandwich.

Kale Chips – Crunchy, Tasty, Healthy, and EASY

28 May

My friend Carolyn has been telling me about how good kale chips are. I kind of found it hard to believe. Kale? Really?

Kale, if you don’t know, is one of those virtuous leafy greens that often confuse you in the supermarket: Is it chard? Is it kale? Is it collards? What do I do with it? And is it going to smell up my kitchen if I try it?

Really, kale is simplicity itself to use. It’s the bumpy looking one with curly edges and a stem that is not very thick (chard’s stems are more noticeable and quite often red or yellow – as in rainbow chard). Rinse well, cut out the stem and cook it much the way you would spinach, just cook it a bit longer, as it is denser and tougher. I don’t use it raw. It is a cool weather crop, meaning that if you have a patch of dirt, you can grow it even in winter, which is a big plus if you are big into seasonal eating.

Now Carolyn loves good food, so I knew she couldn’t be making it up, however odd kale chips sounded to me. And the more I thought about it, the more I considered the Asian seaweed strips I like so much. Wouldn’t it be similar?

So I got myself a bunch of kale – about 8 oz, give or take — from Sang Lee out in the North Fork and gave it a try.

Had to wrestle this from the table in order to get a shot of the shrapnel!

The results were a revelation! The kale chips were crunchy and had a slight, but pleasant bitterness, tempered by the salt. My parents and John the Painter who happened to be doing some painting with my dad downstairs gave it a try – Leandro was not having it – and we made short work of the whole tray. In fact, my pictures are pretty thin on the actual kale because in my eagerness to try them, I forgot to take any photos until we had almost cleaned them out!

I will be planting kale in the late summer and I will be making this all winter long for my late-night movie snack! Thank you Carolyn!

What was left when I remembered to take a picture!

Kale Chips

1 bunch kale (about 8 oz. – can be increased)

1 Tbs oil (I prefer extra virgin olive oil, but you can play around with flavors)

2 pinches salt

Preheat oven to 350°F. Line a rimmed baking sheet with parchment paper. Lay kale pieces on parchment paper, leaving space between all of them – no touching! Drizzle with oil, and sprinkle with salt. Bake for 20-30 minutes, until leaves are crisp. Serve.

Grilled Lemon Chicken – Bring on the Barbecue Season!

25 May

Bored with boring, boring chicken? So was I, until I remembered this quick marinade with the fresh flavors that Spring demands: lemon, basil and garlic. You basically toss it all together in a sealable plastic bag or tub in the morning, and by the time you get home from work it is ready for the grill. Add some grilled veggies, a salad, or some couscous and you could be eating really delicious food about 15 minutes after walking in the door.

Try it out this Memorial Day Weekend and you’ll be going back to it all summer long. Leftovers are great for next-day sandwiches or salad toppers. Thanks to Food To Live By by Myra Goodman (of Earthbound Farms) for the inspiration for this adaptation.

Grilled Lemon Basil Chicken

4 chicken breast halves (6-8 oz each), pounded thin

¼ fresh lemon juice

½ Cup extra virgin olive oil (if you have a seasoned oil, like basil oil or garlic oil, you can substitute up to half the plain olive oil with it)

1 heaping Tbs garlic, minced

2 heaping Tbs minced fresh basil (1 Tbs dried)

½ tsp salt

Several generous gratings fresh ground pepper

Place pounded chicken breasts in a quart-size resealable plastic bag

In a separate bowl, whisk lemon juice, olive oil(s), garlic, basil, salt, and pepper. Add to bag, seal and refrigerate for a minimum of 3 hours.

Preheat barbecue grill to medium-high or heat up your grill pan and spray a bit of cooking oil (only if your pan tends to stick).

Remove chicken from bag and discard remaining marinade. Grill, turning twice, about 4- 6 minutes on each side, depending on thickness, until fully-cooked (there should be no pinkness in the center). Serve with a salad or couscous or pasta with pesto!

Pasta With Roasted Vegetables (Potluck Portion!)

21 May

We always do an end-of-semester party with our students in our language immersion program; after all, when you spend 20 hours a week for 15 weeks with the same class, you get to know each other pretty well, so it’s nice to have an informal day with them.

When you don’t have proper travel packs for food – improvise! Saved rubber band show their worth here.

Usually, we do a massive celebration with all our classes together, but this semester it just wasn’t coming together, so each lecturer did an individual class party.

And sometimes you DO have the right gear: Pampered Chef Measuring Cup with LID

So I passed around a sign-up sheet so we’d know who was bringing what, including paper goods and soft drinks and the like. And my students, who claim to love food and hail from most corners of the earth (Caribbean, Central America, South America, Europe, Asia, SouthEast Asia, and Russia, wrote cookies, snack, cookies, snack…like, what!?! I was NOT going to have a Dunkin’ Munchkin affair.

Mixed up and ready to go…

So I panicked and made a dish myself (which we lecturers don’t often do, since our students are usually so generous with the home-cooked dishes). Pasta seemed the right solution and I was able to carry the sauce separate from the pasta and reheat it in the office microwave…Although we have no vegetarians, roasted vegetables seemed the right way to go.

I needn’t have worried. My wonderful class brought chicken adobo (Philipines), roast chicken (Korea), empanadas (Colombia), warmed greens salad (Haiti), and pasta (U.S. style!). Plus a gigantic and delicious lemon cream cake! So it was a lovely spread and a nice way to close the semester before their big test

The International Buffet

The Thank You Cake

Pasta with Roasted Vegetables

Two pounds short, curly pasta – shells, farfalle, penne, or cavatappi

Vegetables

4-5 Cups mixed chopped vegetables (zucchini/red pepper/yellow squash/cauliflower/broccoli/asparagus)

4 cloves garlic, minced

Small onion, peeled and minced

1-2 Tbs olive oil

Sauce

2 Tbs olive oil

1 medium onion, peeled and diced

2-3 cloves garlic, minced

8 oz button mushrooms (white or baby bella), woody parts of stems removed before chopping

Hot red pepper flakes – a pinch or two, optional

Two 28 oz. cans diced or pureed tomatoes

Salt to taste

1 Cup grated Parmigiano Reggiano or other grating cheese

Instructions

Preheat oven to 375°F. Spread vegetables, onion, and garlic on a rimmed baking dish, drizzle with oil and roast for 1 hour.

Prepare pasta according to package directions.

In the meantime, heat oil for sauce in a large pot until liquid and fragrant. Add onions sauté for a minute, then add garlic. Saute for an additional minute, then add mushrooms. Cook at medium heat until mushrooms release their liquid (about five minutes), stirring occasionally. Add pepper flakes, if desired, and add canned tomatoes. Cook at a slow simmer until vegetables are finished roasting. Add vegetables and stir to combine. Add pasta and cheese, mix well and serve.

Duck Egg Frittata with Asparagus (Hen’s Eggs Can Also be Used!)

18 May

We spend our Mother’s Days in the North Fork of Long Island (where I expect I’ll end up living one day), Abu, Padushi, Leandro, and me. We had another beautiful time this year, eating and drinking and having fun with friends.

The Long Island Sound was our back yard!

And of course on the way home we picked up some farm fresh goodness to keep savoring the visit.

In season now: ASPARAGUS, so we got some from Sang Lee. Really, when asparagus is in season in the North Fork, it is worth the drive just for that, even if you don’t have anyone to visit!

Sang Lee asparagus

And we stopped for eggs at Ty Llwyd. Our friend Dave had four duck eggs available too, and since my last experience with them was so memorable, I took them all.

Unwashed eggs don’t require refrigeration – for a few days anyway….and these were definitely unwashed! (I rinse before cracking though…)

With ingredients this good, you don’t have to do much. In fact, the more you do, the more you get in the way sometimes (a lesson I never seem to have learned, some might say, but they can just hush up, because it’s my blog post and I’ll fry if I want to). However, if you would like to try a Hollandaise, click to visit my fellow blogger Mad Dog’s step by step instructions!)

So I went for something pretty simple and non-fussy, but with style. This frittata shows off the flavors of Spring, looks rustic-wonderful, and doesn’t take much doing. Sort of the kind of thing that Leandro should learn to do when he’s old enough to bring me breakfast in bed for Mother’s Day!

Gorgeous!

Duck Egg Frittata

2 Tbs extra virgin olive oil

½ onion, chopped (red preferred)

Approximately 10 asparagus spears, trimmed, and sliced thin on the bias (may be precooked; I used leftover roasted, which were lovely)

4 duck eggs (6-8 hen’s eggs if you want to substitute!)

¼ Cup grated Parmigiano Reggiano or other good grating cheese

Pinch of salt

Heat oil in a small to medium ovenproof skillet at medium until loose and fragrant. Add onions, stir to coat and sauté for five minutes or more – until tender and browned. If using uncooked asparagus, add it one minute after the onions. If using cooked, add after the onions are tender and browned, then cook an additional minute. Either way, reserve a couple of the tops for garnish.

Meanwhile, in a separate bowl whisk eggs, cheese, and salt together to mix thoroughly. Pour eggs over vegetables in pan and mix thoroughly. Preheat the broiler to high/450°F.

Using a flexible spatula, turn the egg mixture away from the sides of the skillet as the egg solidifies, allowing the uncooked egg to run to the bottom of the pan. Continue this until egg mixture is well set – 5-10 minutes, depending on the thickness of the frittata (depth of skillet) and the stove top heat. Don’t rush this. You can stick a knife in the center to measure progress. 

Use the spatula to get under the frittata occasionally and make sure it doesn’t stick to the bottom. Shaking gently every so often can also help.

As the top is almost set, stick the reserved asparagus tops into the surface so they look pretty!

When egg is set, put the whole skillet under the broiler for 3-5 minutes (longer if you frittata is thick) until the top is browned.

Let sit for five minutes, then serve.

Spinach or Chard or Kale Pasta – the fastest pasta in my arsenal

15 May

When it is crunch time – 5:30 p.m. and nothing planned for dinner, or 10 p.m. and nothing made for Leandro’s lunchbox, I do not despair. As long as there is a bag, or half bag of frozen spinach or chard or kale in the fridge, a box of pasta and some garlic (and there pretty much always is), I am good to go.

Leafy greens are powerhouses in the veggie world. Kale provides calcium, Vitamins A, C, and K, potassium and folate. Chard has vitamins A and D. Spinach has iron. And best of all, my son, who I started on garlicky, cheesy pureed spinach on pasta as one of his first solids, doesn’t really differentiate among them, so I can vary at will. Start your kids on the good stuff early, I am telling you!

Second best of all? They are all terrific from frozen bags.

And third? You can throw the frozen greens right in with the boiling pasta…ladies and gentleman, this is a one-pot convenience meal par excellence.

I have posted a similar recipe before, with options for freezing the sauce for baby food, but this time I am giving you the bare bones with how to handle each green. You can, of course, also use fresh greens, but our spinach and chard isn’t ready for harvest yet, so I am still using bagged.

Pasta with Dark Leafy Greens

(this can be halved for smaller meals)

1 lb. pasta of your choice (the curly short kind or farfalle/bowties grip the greens best)

1 lb bag frozen chopped spinach, kale, or chard

2-3 Tbs extra virgin olive oil

4 cloves garlic, minced

salt and hot red pepper flakes to taste

abundant grated cheese (Parmigiano Reggiano, Grana Padano) or 1/2 cup crumbled feta

Bring abundant salted water to the boil. Add pasta and, if using kale or chard, add that immediately too. If using spinach, add halfway into the pasta cooking time.

Drain the pasta and vegetables and return the empty pot to the stove at medium heat. Let any residual water boil off, then add olive oil, garlic and optional hot red pepper flakes to the pot. Cook garlic gently until browned, then add pasta, greens and cheese to the pot. Combine thoroughly, salt to taste and serve.

And the garden grows!

11 May

It’s working! It’s working!

Today we harvested the first leafy things from our new raised beds. I couldn’t be more excited! Leandro and my dad harvested lettuce leaves, and they also thinned the radishes.

Baby, baby…rinse and eat.

The freshness and flavor were mind-blowing (for the grown-ups, at least. Leandro tasted, and rejected, but nevermind…he will come around eventually…and at least he’ll never embarrass me on a Jamie Oliver program by not knowing his veggies and where they come from….). No recipe, just farm to mouth, and then farm to salad spinner, and a whisper of oil and vinegar.

Here, some quick pictures of our first draw, so you can celebrate with us.

Padushi and grandson, working together

He didn’t like it (spit it out everywhere, in fact), but he tasted it. Willingly. And that is all I ask.

The grandson took out a bit more than we intended, but doesn’t it look nice?

Can These Strawberries Be Saved? Yes!

10 May

‘Tis the season of strawberry temptation. You know, such a good price on 4 fragrant ruby lbs. of strawberries that you don’t even think about the organic vs. conventional argument, or about who is going to eat them all.  You put that clam shell right into the shopping cart and carry on.

And then a few days later, you re-encounter said clam shell, about two pounds lighter in strawberries.  But the ones that are left are looking sad, faded, withered, mushy, maybe even a little gray and mossy in spots. A bit like Lola the Showgirl thirty years on at the Copa.

They seemed like a bargain at the time, but now they threaten to become food waste, a drain on your wallet, a stink in your trash can, those starving children in Ethiopia that your mom used to tell you about, yakkity, yakkity, just wrong.

Relax. There is a way to save them, make them delicious and desirable once again, make yourself feel better about your folly.

Roasting. Yes, roasting. Toss those aging beauties (do cut out those grey mossy bits, of course, and all the other dubious bits) in sugar and balsamic vinegar (and rosemary if you are so inclined), roast for an hour, and you will end up with some deliciously jammy stuff that you can use on toast, stir into plain yogurt, use to top ice cream or even experiment with to make some sort of chutney or relish for meats.

As the strawberry season is upon us, I know I won’t be the only one to make ridiculous seasonal purchases. Here, at least, is one solution to the retail hangover.

Roasted Strawberries (adapted from The Oregonian)

1 lb strawberries, hulled and cut into 1” pieces if the whole fruits are bigger than that

scant ¼ Cup sugar

2 tsp balsamic vinegar

Preheat oven to 375°F. In a bowl, toss the berries, sugar and vinegar. Spread berries on a rimmed baking sheet and roast for about an hour or until soft and dark. Stir occasionally. Remove from heat and cool before serving. Will keep a couple of days in the fridge.

Pasta al Tonno II (Black olive variation – freezeable!)

8 May

A while back I tried out a pasta with tuna recipe on my son. It had green olives and capers, as well, so we are not talking about subdued flavors off the kiddie menu. He loved it, because he is not a kiddie menu type of kid (except for the macaroni and cheese and those portions are anyway TOO SMALL) so I decided to try another variation (actually the one I first learned from Susana Villanova in Italy, way back when and still one of my favorites) AND an experiment.

I saved half the sauce to see if it would freeze well.

Add or subtract olives as you see fit!

Leandro thought it was great the first time and had seconds, plus lunch the next day! Two weeks later, I defrosted the second pint in the fridge and made it up for a dinner. Success! It was just as good, if not better, and I got a dinner and lunch out of it for the little guy.

Fast, cheap, and hearty! Easy too, except for trying to keep him from using his hands and then wiping them off on his clothes….This will be a new emergency staple (notice – all of these are pantry ingredients except maybe the onion – which is pretty much a pantry item around here!)

Good for boys and girls and grown-ups too!

Pasta al tonno II (with black olives)

1 lb of long flat thin pasta (I like fettucine, but linguine or thick spaghetti will work fine; half this if you are going to freeze half the sauce for later)

2 Tbs extra virgin olive oil

1 small to medium onion, chopped fine

28 oz can crushed or peeled and chopped tomatoes

6 oz can of light or white tuna (I use water packed, but you can use oil-packed if you drain. I do not drain the water-packed tuna)

20-30 pitted black olives, sliced

Teaspoon of dry oregano/parsley/basil or Tbs fresh (optional)

Salt to taste

Prepare pasta according to package directions. Drain and set aside.

Heat oil in a  medium pot on medium-high until fragrant. Add onions, stir to coat and lower heat to medium low. Allow to soften — about five minutes. Add tomato and bring to a simmer – about five minutes. Add tuna and olives, salt and herbs to taste and allow to cook for 5-10 minutes (15-20 if you have time). Mix into cooked pasta and serve.

If you plan to freeze half the sauce, put in a freezer-safe container. It will stay nice at least a couple of weeks.