

Today’s post will be very straightforward and workman-like, as today I have to finish up a magazine article and my parents are having their annual holiday cocktail for a group of friends, so we will be busy all day! It suits, however, because for all the vibrant color and flavor of the result, this is one of our everyday, workman-like meals. Continue reading
Archive | Food RSS feed for this section


Sauteed Onions and Peppers with Curry (super side dish or turkey burger topper!)
1 Dec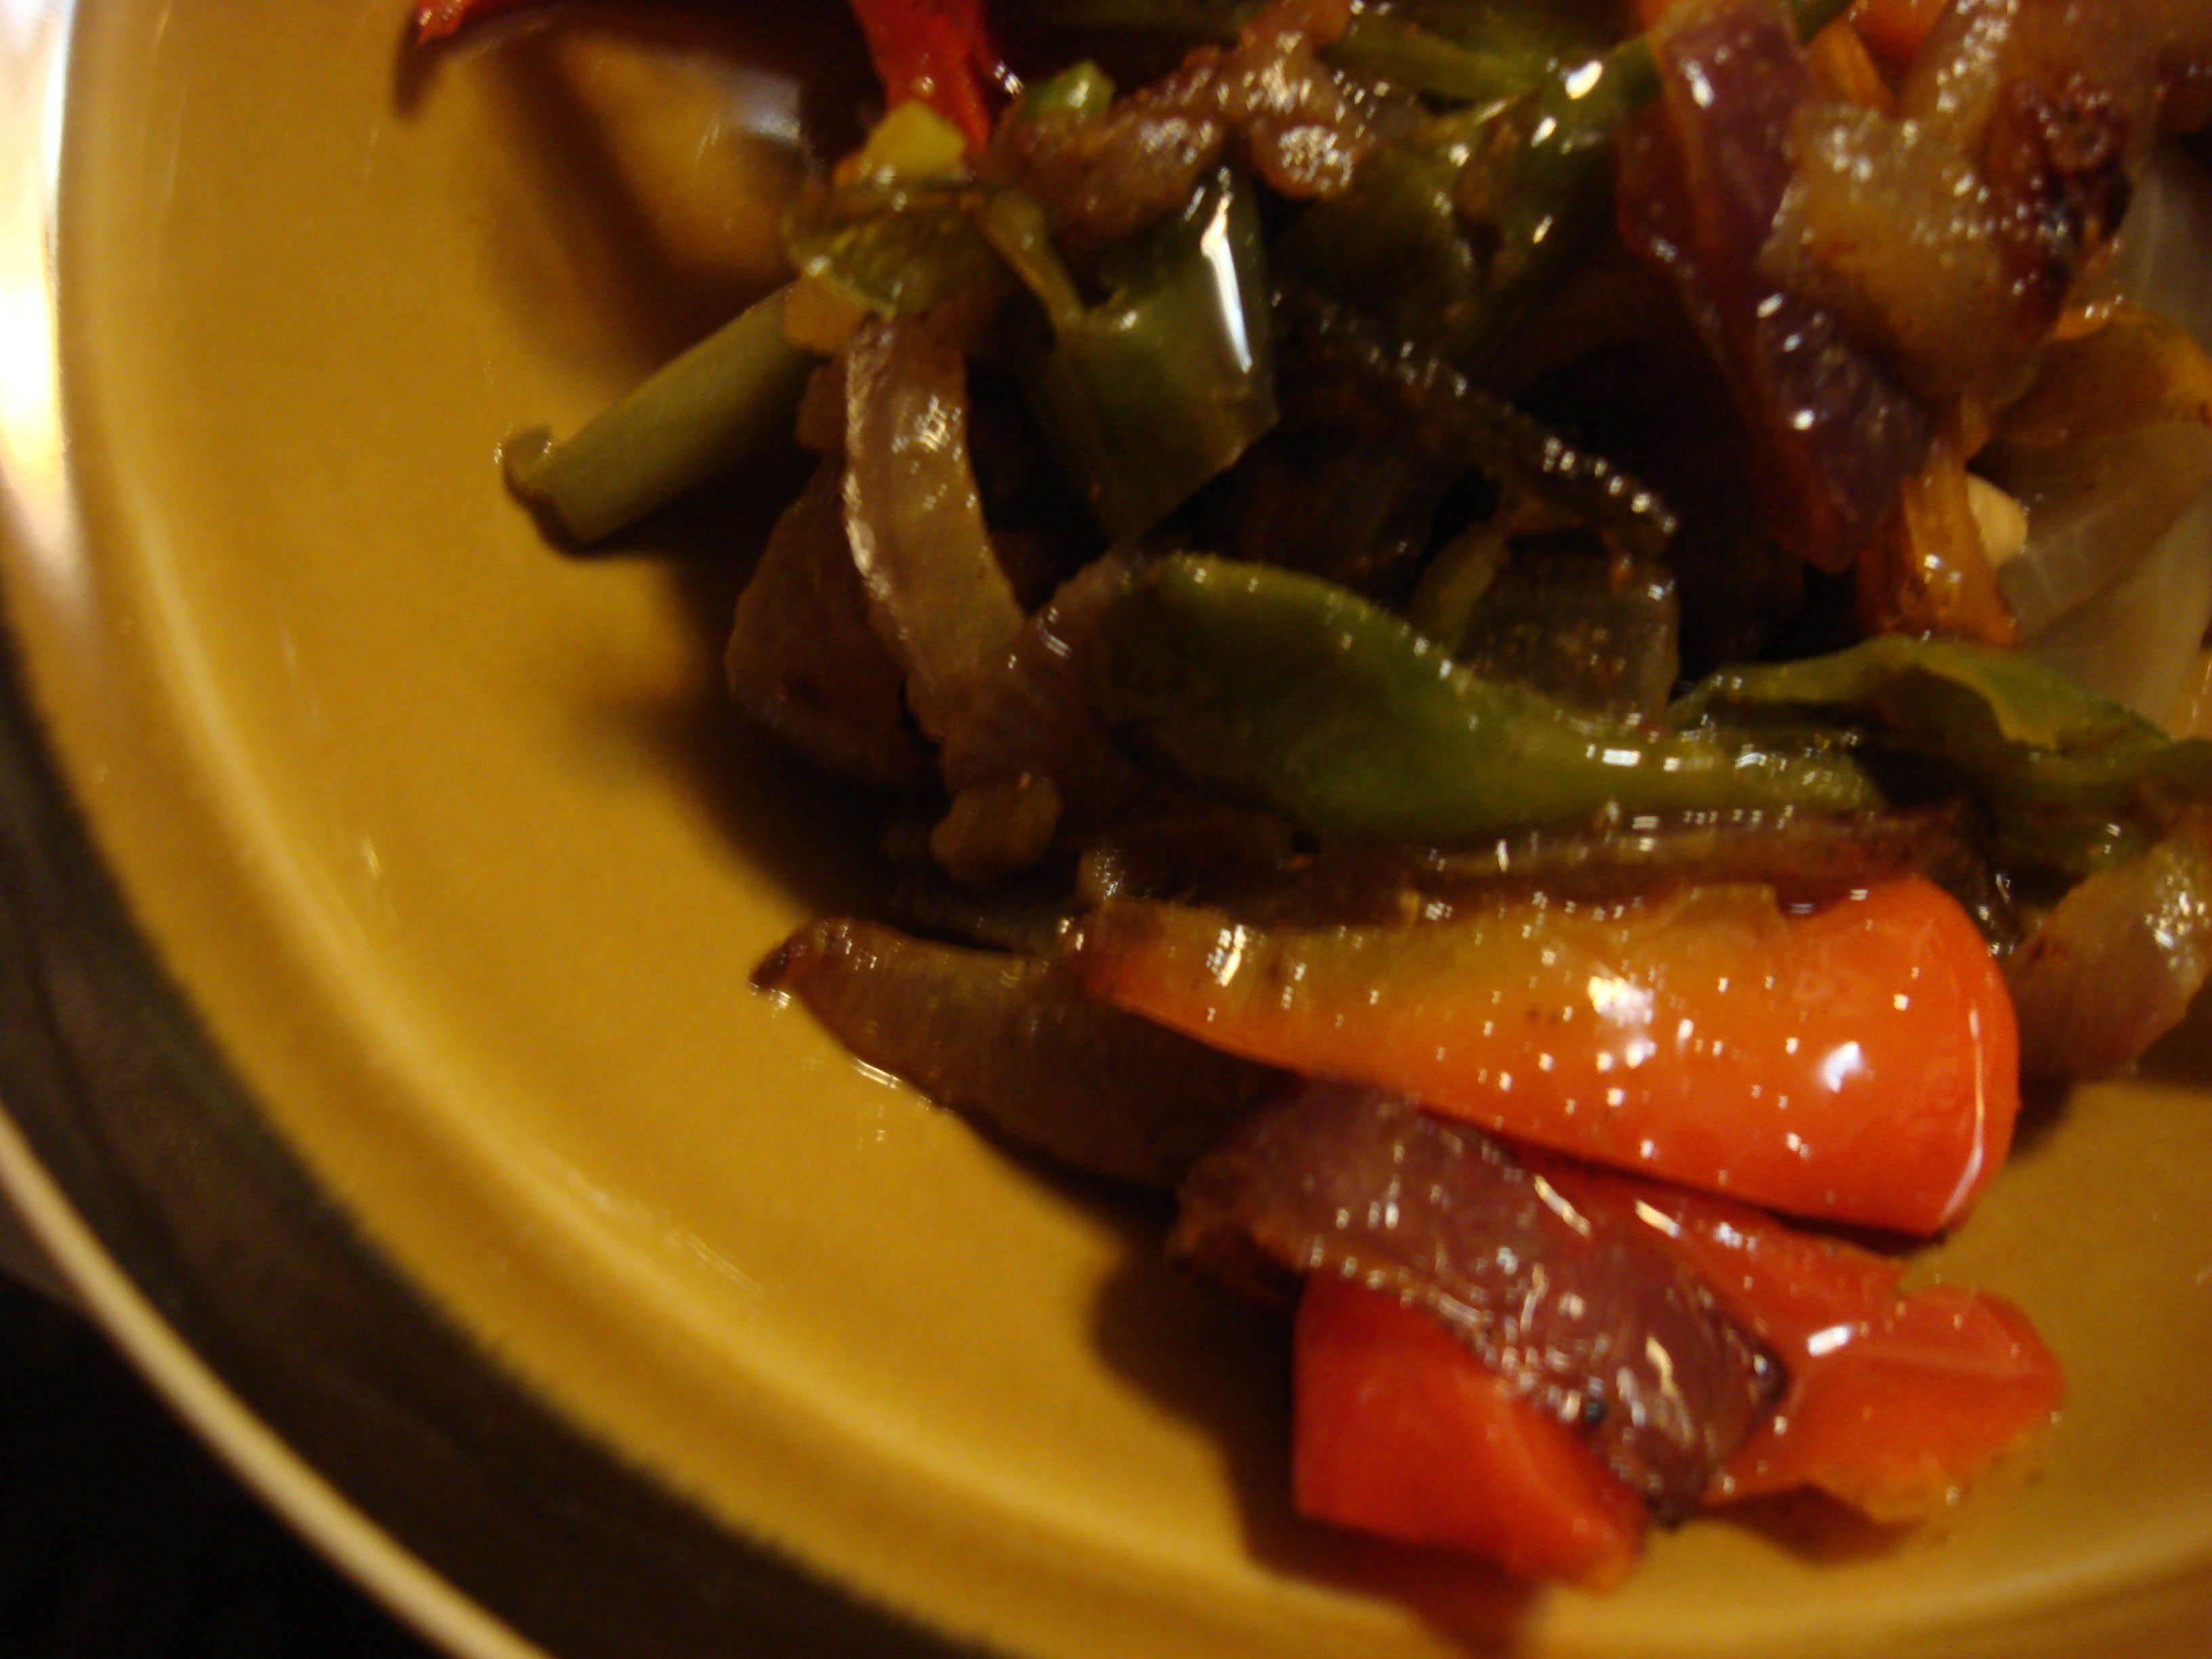
On its own or with rice, these mildly curried vegetables are a worthy side dish!
The post-Thanksgiving self-flagellation and sporadic attempts to lose five pounds (okay, ten) before Christmas have begun. Continue reading
Grilled Butternut Squash
28 Nov
This simple recipe for grilled butternut squash is another Padushi special, straight out of his crumbling crazy-ass diet (for new readers, the crazy-ass diet is some sort of vegan-gone-completely-over-the-edge thing that consists primarily of carrots, beets, and potatoes, and doesn’t let you combine veggies that grow above the ground with veggies that grow below the ground in the same meal. Don’t ask.)

Use the seed well to mix the oil and spice
He is, thankfully, no longer strictly on it anymore, although there are still moments of madness.
Much of what he made for the crazy-ass diet was okay eating. Some of it was just this side of edible. But this recipe, which takes the unusual step of grilling the squash, is really delicious in its own right.

Great grill marks!
It was especially handy during the power outages following Hurricane Sandy, as butternut squash, a native American squash in the Cucurbita family, is in season, doesn’t need refrigeration and the grill runs on propane, independent of nationalgrid and LIPA. We have the power back, but grilled butternut squash is delicious any time! It also has loads of vitamins (especially A) and minerals (like potassium)

Creamy inside, smoky outside!
Grilled Butternut Squash
1 butternut squash
1 tsp olive oil
1 tsp Adobo powder or salty seasoning of your preference (something curried would be nice!)
Heat the grill to high.
Slice squash in half lengthwise and clean out the seeds. Discard seeds or clean, dry and roast for a separate snack.
Pour half the oil and half the seasoning into the bowls of each squash half. Using hands, mix the oil and seasoning, then spread evenly over the entire squash, including skin.
Put on hot grill, skin side first, and close grill. Cook until a fork will easily pierce all the way through (about 30 minutes), turning onto flesh side about halfway through cooking.
You may also like:
Grilled Potato Disks: Like Fries Only Better
Grilled Lamb Chops and Sauteed Calabaza Pumpkin
Whip It Good (Make Your Own Whipped Cream in Minutes)
27 Nov
Making your own whipped cream and is easy and fun for kids.
 The texture is much more velvety than store-bought and it doesn’t bring extra additives.

Whipped!
Leandro and I made an apple crisp for Thanksgiving, but we didn’t actually start eating it until a couple of days later because we were so full! Instead of ice cream, we made our very own whipped cream.
It is so simple – takes five minutes! – and the results are so satisfying.

With warm apple crisp
Whipped Cream
Before you start: put the bowl and whisk or beaters in the freezer so they are ice cold when you are ready to use. Another note – whisking can take awhile, especially when you have eager little helpers. We use a hand beater instead of a whisk, which Leandro could manage quite well (as long as he kept the beaters in the cream) and then got to lick after!
Ingredients
1 Cup heavy cream (whipping cream is actually not the best choice!)
1 tsp vanilla extract
1 Tbs confectioner’s sugar
How-To
In a large bowl, whip cream until you begin to get thick waves that threaten to peak. Beat in vanilla and sugar until peaks form. Stop there! Don’t overbeat it into buttery lumps.
You can store by lining a sieve with culinary cloth, putting the whipped cream in and then setting the sieve over a bowl, but it never lasts that long around here. You can also freeze it apparently, but I have yet to try! This makes about 16 generous tablespoons worth.
Smoked Salmon on Toast (an excuse to discuss salmon choices)
26 Nov
This is not really a recipe.It’s much more about making informed seafood choices, as you will see.
For our weekend breakfasts we:

Leandro’s plate of smoked salmon
Toast bread slices, spread with butter, pile on the smoked salmon on the side for Leandro.
Toast less bread, spread with butter, pile on the smoked salmon, a half teaspoon of finely chopped onion, and a half teaspoon of drained capers (drain well, as the caper juice will overpower the salmon) for me. You could also dollop on the sour cream or dab a bit of cream cheese.
That’s it.
What this really is is a chance to talk about selecting salmon.
About that gravy. (Roast turkey and gravy, pavochón-style)
25 Nov
Let’s start by saying that I did NOT screw up the gravy this year. (Click here for last year’s debacle). In fact, it was smooth, fragrant and delicious.

Brining the turkey requires just a bucket, a trash bag, salt and water. The difference it makes is amazing!
However, (you knew this was coming) it was also too damn salty. But… Pedro’s turkey, duly brined and seasoned Puerto Rican-style, was juicy, tasty and all around wonderful. And I have worked out why and the gravy recipe (which may very well be repeated at Christmas, and certainly next Thanksgiving) has been modified accordingly.

Leandro mashed up the adobo
So what happened with the gravy?

Pedro really gets in there with the adobo
Two things. Usually to make the turkey stock I add my own home-made chicken stock which has little or no salt additional to whatever salt the carcass I used brought with it, or I buy low-sodium stock to simmer in conjunction with the turkey necks. This time, I used store-bought chicken stock with all the salt, thereby adding salt where none was needed.

Trussed and oven-ready
Two, the pavochón-style spice rub (adobo) that is actually a recipe for roast pork/roast suckling pig modified for turkey is saltier than what we usually prepare (and Pedro cut the amount recommended in the classic Cocina Criolla by Carmen Aboy de Valldejuli in half!).

And…a beautiful pavochón!
The turkey was perfectly salted, but the pan juices that I relied on for the gravy were much saltier than I anticipated. So, live and learn.

Pan juices on the stove for deglazing
The solution? The next time we make this particular adobo, I will make sure that I have my own no-salt stock laid by for the gravy.

Smooth, baby. Smooth.
And this time, at least, my mom didn’t have to bust out the jar of gravy. I think this time she didn’t even buy one. I appreciate the vote of confidence.

The Surgeon at Work
Roast Turkey, Latin-style (Pavochón)
Overnight, brine a 10-12 lb turkey, quills removed and neck and giblets (excluding liver!) reserved for making stock. (8 quarts water, 2 Cups kosher salt in a bucket lined with a trash bag. Keep chilled overnight)
In a large mortar and pestle, mash:
3 large cloves garlic, peeled and roughly chopped
20-25 peppercorns
Add:
1.5 Tbs oregano (dry)
1Tbs oregano (fresh or just add another half Tbs dry)
6 tsp coarse kosher salt (1/2 tsp per pound)
4 Tbs extra virgin olive oil
Additional ingredients for the turkey cavity:
1 stalk celery, snapped in half
1 carrot, peeled, and sliced in half
1 onion, peeled and cut into chunks
1 bay leaf
Additional ingredients for the gravy:
1 navel orange, peel on, chopped into chunks
1 red onion, peeled, chopped into rough chunks
1 Tbs butter, softened
1 tsp extra virgin olive oil
4 Cups turkey stock (as low in salt as possible)
1/3 Cup all-purpose flour
Instructions
Preheat the oven to 450°F.
Use the ingredients in the mortar and pestle to season the inside and outside of the bird and under the skin. Leave some of the spice paste in the mortar and pestle and add additional oil; you will be using this for basting.
Stuff the turkey with the ingredients for the cavity. Tie the drumsticks together and pin the wings to the body with small skewers.
Put the turkey on a rack set in a large flameproof roasting pan and roast in the center of the oven for 30 minutes.
While turkey is roasting, toss the orange chunks and onion in the butter and oil listed under gravy ingredients.
Reduce the oven temperature to 350°F. Brush more spice paste (adding oil if necessary) all over the bird. Put the orange chunks and onion underneath the rack (this will season the pan juices which you will need for the gravy) and return the turkey to the oven, basting every thirty minutes until an instant read thermometer inserted into the fleshy part of the thigh reads 170°F.
Important note: We also had a pop-up thermometer in the breast, which popped up waaaaay before the thighs were cooked (a typical problem and the reason why the breast on roasted whole turkey is often dry and overcooked. We simply turned the turkey over onto the breast and kept roasting, sacrificing crispy skin for juicy breast. You decide what you want – we may actually cook the bird in pieces next year – but having two different thermometers for the two major zones of the bird was very helpful).
When the bird is done (total roasting time is 1.5-2 hours), remove and discard the vegetables in the cavity and let the bird rest on a platter for an hour before slicing.
Gravy (do this right away so the liquids are still hot)
Transfer the pan juices (with oranges and onions) to a 2-quart glass measure, then skim off and reserve ¼ Cup fat.
Add enough turkey stock to bring the pan juice level to 4.5 Cups.
Set roasting pan across two burners, add one cup of the pan juice mixture and deglaze pan over moderately high heat, scraping off any brown bits. Add the rest of the pan juice mixture and bring to a simmer. Strain through a fine sieve back into your 2-quart glass container and discard the onions and oranges.
In a heavy saucepan, whisk the reserved fat and flour together and cook at medium low, whisking, for about 3 minutes. Then add hot pan juice mixture in a fast stream, whisking constantly to prevent lumps, then simmer, whisking occasionally, for about 10 minutes, until thickened. Salt to taste (but we didn’t need ANY additional salt. We needed LESS salt!)
Serve turkey with gravy on the side.
An International Student Thanksgiving!
24 Nov
Many of you know that in my other life I am a full time instructor of English as a Second Language at a community college. My students come from all over the world representing numerous languages, nationalities, ethnicities, and religions.

Chicha, Peru. This is a beverage made of purple corn and seasoned with cinnamon. A revelation in holiday beverages (no alcohol, but certainly has the potential to make a delightful cocktail!)
Since it is an intensive immersion program, we spend a lot of time together in the course of a semester. Twenty hours a week for fifteen weeks, in fact.

Fish cutlets, India. Dense, yet creamy croquettes with a flavor that is not too fishy, but robust.
So it is wonderful to be able to share that most American and most inclusive of holidays — Thanksgiving — with all of them.

Foreground: Griot, Haiti. Pork shoulder deliciousness, with savory vegetables like onion and peppers and a spicy sauce. Center: Indian fish cutlets. Back: empanadas.
It reminds me of just what a true celebration of America, its achievements, and its possibilities, Thanksgiving is.

Pupusas, El Salvador (sort of a thick, soft tortilla or arepa, stuffed with cheese, sometimes beans or meat, and topped with a Salvadoran cabbage slaw)
So after a major in-class essay-writing assignment (which I still have to grade before Monday. Yikes!), we unwrapped our potluck offerings, did a little heating up in the office microwave, (one student even plugged in her slow cooker!), and tucked in.

Top: empanadas (I am not sure where these are from actually: Perhaps one of the student who reads the blog can tell me so I can fix this?), popular all over Latin America, they are meat, cheese, or pizza stuffed pastries, and bottom, sugared peanuts from Angola.
We should’ve brought hammocks too; after this incredible feast, we had the classic Thanksgiving hangover: food coma and barely dragged ourselves through the History Channel Thanksgiving lesson.

Oven-roasted chicken, El Salvador. This was falling off the bone, juicy and delicious!
So today I am showing you some images of the feast – not the students, because I didn’t ask their permission to put their pictures on-line!

My plate!
Thanks to my wonderful, hard-working, inspiring, and fun students for this feast, especially the ones who cooked!
I will NOT screw up the gravy this year; luscious turkey stock in progress
22 Nov
Regular readers will know that I disgraced myself last Thanksgiving by ruining the stock for the gravy; I put the liver in and rendered the stock (and the air in my kitchen) utterly disgusting. My mom triumphantly saved the day with a jar of gravy and I was mortified on many levels.

Leandro shows off as he pounds the turkey spice rub
That is not going to happen this year, thus this real time post to give you my stock recipe and let you know things are progressing fine! Continue reading
Yes, You Should Brine Your Farm-Raised Turkey. Here’s How.
21 Nov
“Why don’t you just get a Butterball and be done with it?” says my brother, or my sister-in-law, or my mother at some point every Thanksgiving or Christmas. “Why do you have to make everything so complicated?”
Indeed.
 My immediate family – not unreasonably – often finds my and my dad’s insistence on getting a farm-raised bird expensive, unneccessary and annoying. They are probably right. You have to order ahead. You have to spend $3 or $4 a pound more. You have to go pick it up (although turkey pick-up at Restoration Farm involves seasonal festivities that some people need a designated driver for). And yes, you really need to brine it. Continue reading
20
Nov
Note to Hot, Cheap & Easy readers: Miss Marzipan made a variation of my Walnut Toffee Triangles…with Pecans and Maple! Looks good, doesn’t it?
Natalia de Cuba Romero
Great food - Simply
Eat Your Way Through Puerto Rico: Chow Like a Native

Click on the image to purchase at the iTunes store!
Unlock the Language of Puerto Rican Flavor
Click on the image to purchase the Kindle Edition!
¡Comida Hispana! Recipes to unleash your inner Latino
-

Mango Mojitos With Ancho Chili Salt
It was another summer Friday in the neighborhood and that called for another festive cocktail. Riding high on the success of last session’s passionfruit mojitos, I decided to make mango mojitos. The drink itself followed much the same construction, but the mango was decidedly sweeter than the passionfruit, so I decided that it needed a […]
-

Passionfruit Mojitos by the Pitcher or Glass
Summer evenings in the neighborhood can be wonderful. Occasionally on a Friday some of us neighbors bring out folding chairs and sit together in one front yard for a bit of happy hour while the kids go mental on someone else’s lawn. It’s pretty much BYO, but we do mix up a pitcher of experimental […]
-

KID IN THE KITCHEN: Tembleque (Tropical Coconut Pudding)
We spent the better part of last summer in Puerto Rico, and among the tasty things that my little guy fell in love with was tembleque, a jiggly (temblar means to tremble) dessert that falls somewhere between pudding and flan. I promised him we’d make it back in New York, and this weekend, for a […]
-

Sangría Tropical (and rainforest paradise pictures)
When the heat gets tropical, so should the drinks. On a recent trip to the mountains of Puerto Rico, I was inspired by a wonderfully cooling and exotic sangría I had up around and about El Yumque (Caribbean National Forest, the only tropical rainforest in the U.S. Forest Service system) at Noelia’s, recommended to us […]
-

Salmorejo de jueyes (Land Crab Stew)
There are a number of land crab species skittering about Caribbean coastlines. Some are edible and the one we eat most here in Puerto Rico (although I am told they mostly are imported from Venezuela these days) is Cardisoma guanhumi which we call juey and — if you are English-speaking — you might call the […]
Foodie Blogroll
Rights

Hot, Cheap & Easy by Natalia de Cuba Romero is licensed under a Creative Commons Attribution-NonCommercial-NoDerivs 3.0 Unported License.
Based on a work at hotcheapeasy.com.
Permissions beyond the scope of this license may be available at http://hotcheapeasy.com.
