Broccoli and Chorizo Pasta with Cheese

18 Apr

creamy, crunchy, stodgy, zesty

I needed some comfort food with attitude (and no trips to the grocery store).

Some of you will remember in the early days of this blog that Leandro and I were in the emergency room twice within a month’s time to get him stitched up. That stress is in the past, but the part about having to pay the equivalent of an entire paycheck to cover what the health insurance doesn’t is a stress that is very much in the present.

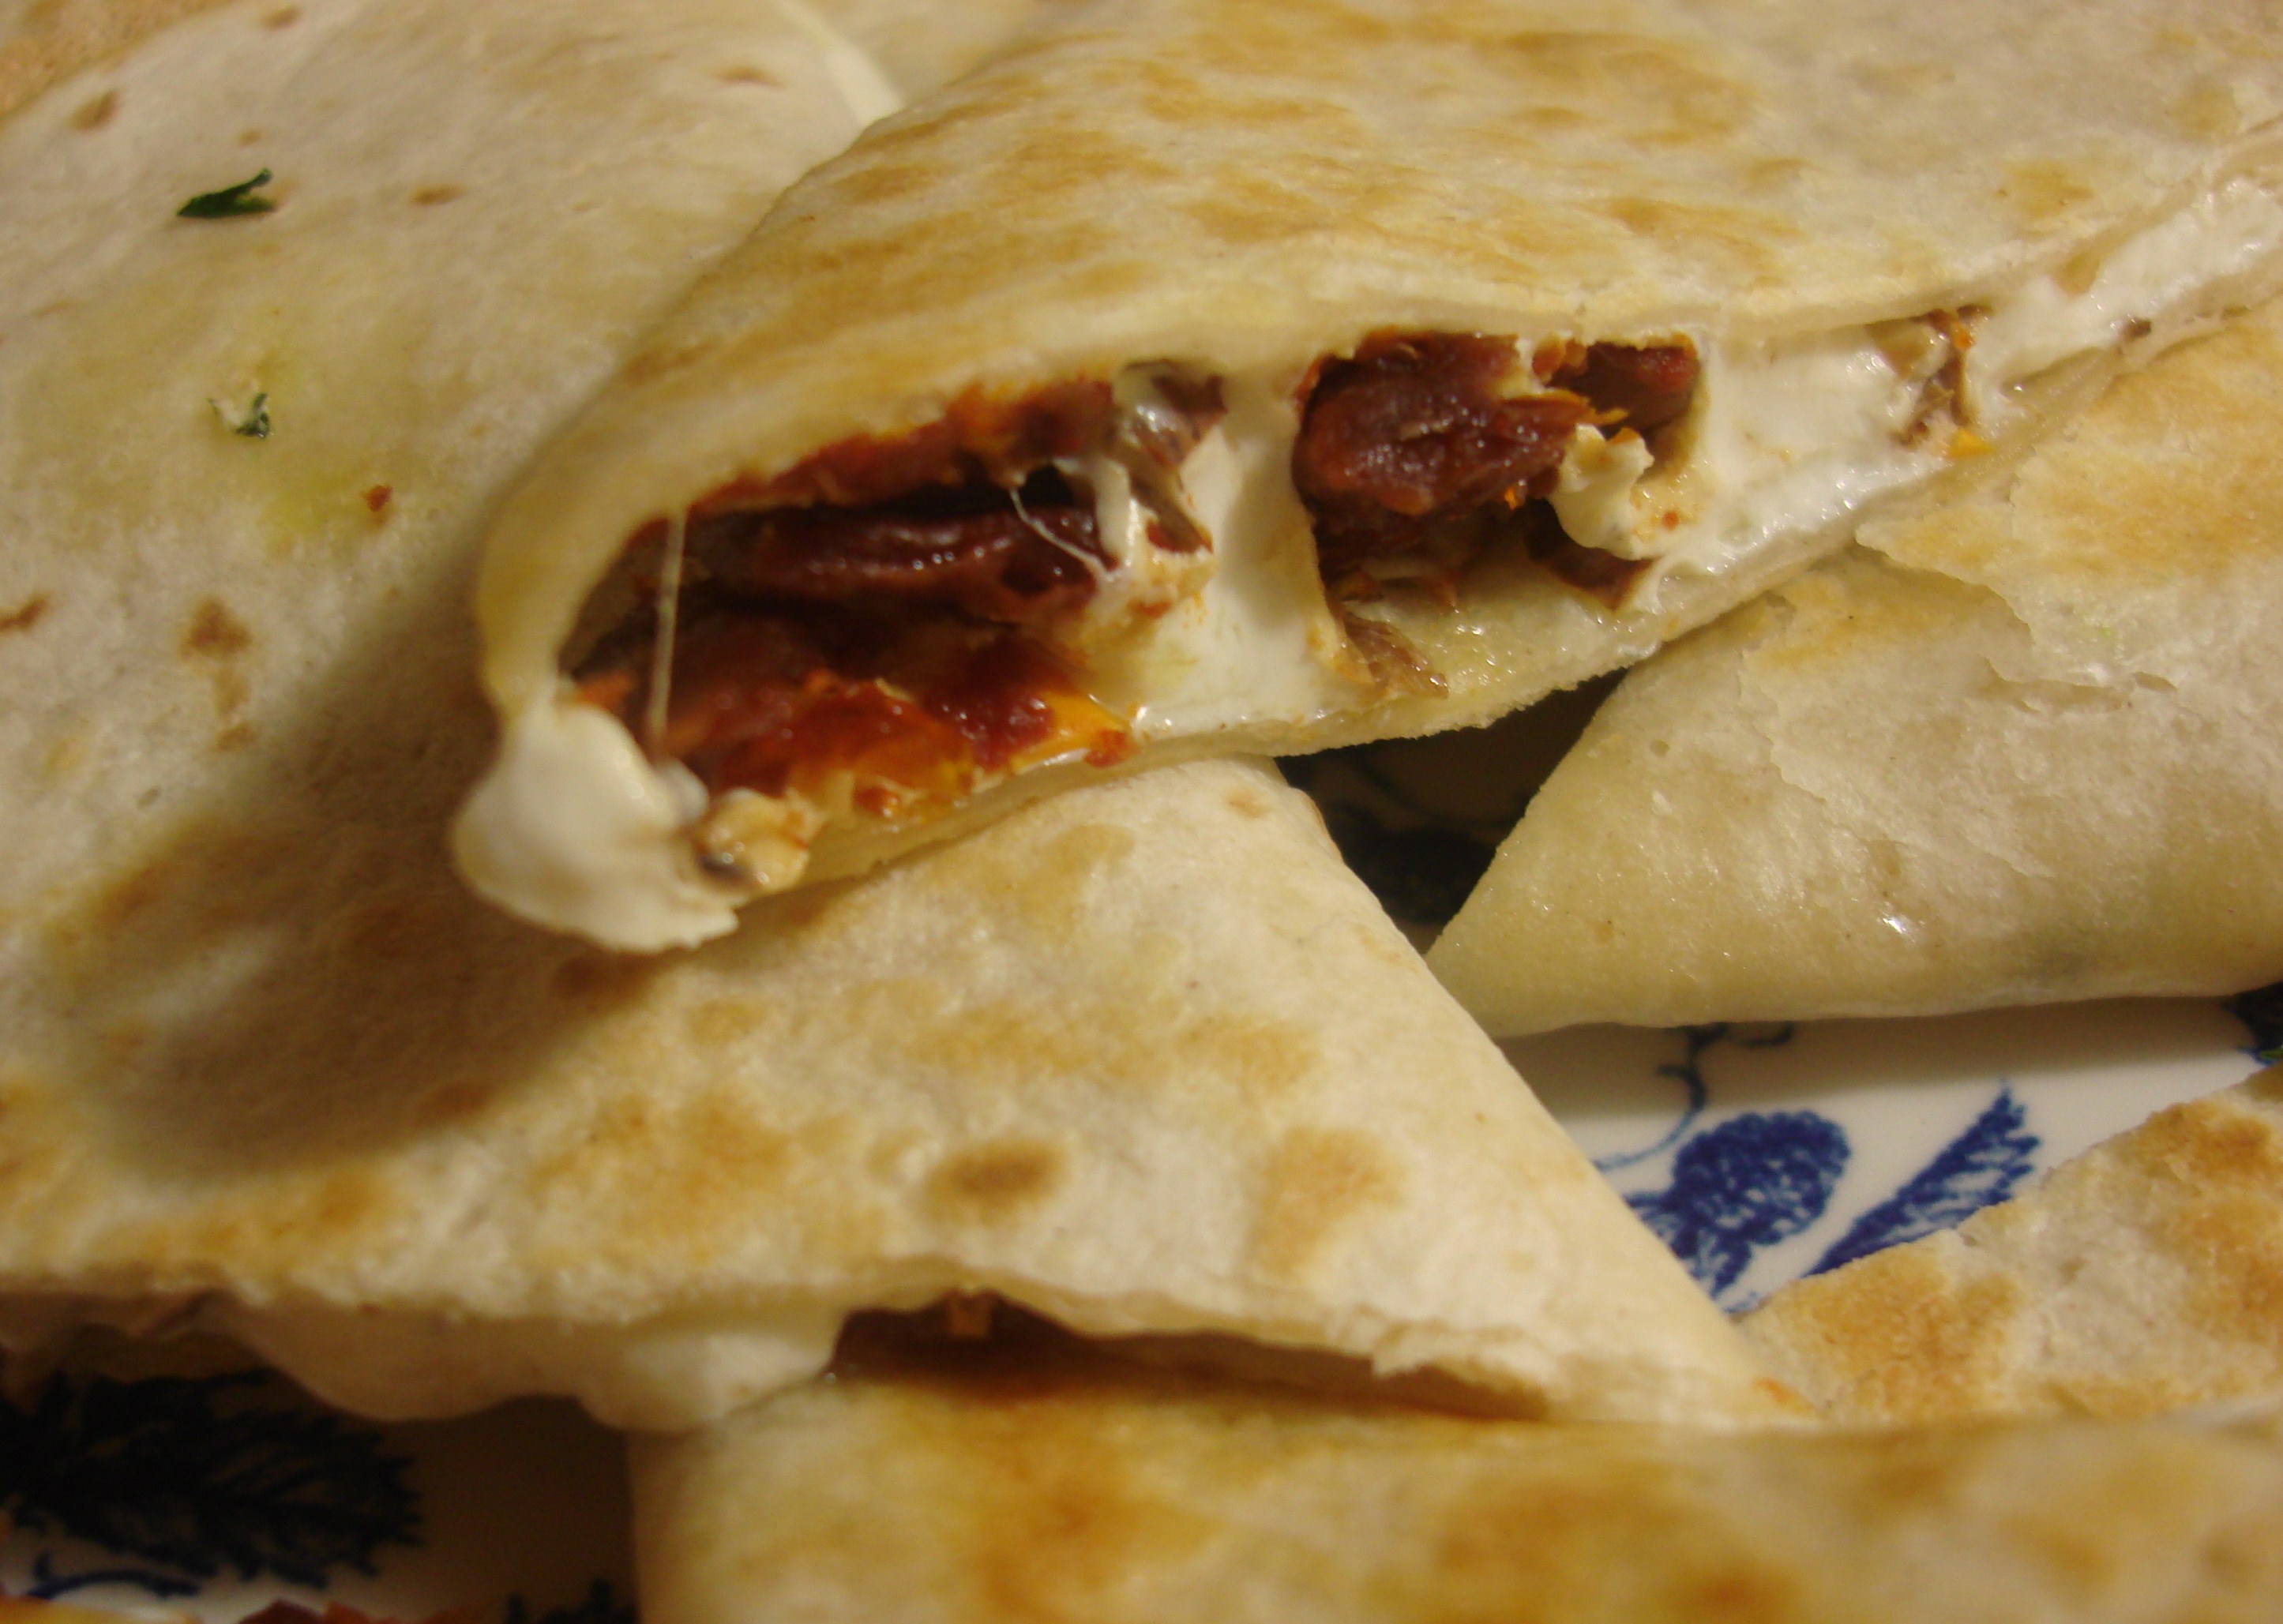
So, I was in the mood for something cozy but kicking, something that didn’t call for a whole lot of work or special ingredients. And ideally, it would be something I could also put in Leandro’s lunch box the next day. The solution — after a quick rummage in the fridge — was this invention: Broccoli and chorizo pasta with cheese. I used catanisella pasta (a new shape for me) figuring Leandro would have fun with its long, skinny, tubiness and because I wanted something that the cheese would cling to rather than clog up (think of macaroni shells scooping up clumps of cheese). The broccoli crunch balanced the creaminess and the spice of the chorizo cut through any density. All in all a great success that did the job!

Broccoli and chorizo pasta with cheese (serves 4)

1 lb pasta – preferably medium short

2 Tbs extra virgin olive oil

½ yellow onion, peeled and chopped (about 1/2 cup)

8 oz hot (picante) Spanish-style chorizo (the cured, ready-to-eat kind…NOT Latin American chorizo, which must be cooked through. You may substitute dry Italian sausage or andouille sausage), peeled and sliced into ¼ inch rounds

8 – 16 oz broccoli crowns, washed and separated (blanched if desired. I usually use a strainer and dip them in the boiling pasta water for a minute until they turn bright green)

½ cup grated Parmigiano Reggiano or Gran Padano cheese

Boil pasta according to package directions (dipping broccoli into the boiling water to blanche). Reserve a ¼ cup of the pasta water.

Heat olive oil at medium-high in a heavy-bottomed  saucepan until fragrant. Add onion, stir to coat, then lower heat to medium and allow to become translucent and soft (at least five minutes). Add chorizo, stirring occasionally, until it begins to release its reddish oil. Add broccoli, stir to coat and cook until beginning to wilt (2 minutes or so). Add ¼ cup reserved pasta water and simmer until slightly thickened. Stir in cheese, add to pasta and serve. (It is doubtful that you will need to add salt, as the chorizo and the cheese will provide plenty!)

Souped Up: Andouille Sausage, Garbanzos and Kale

13 Apr
Aye me hearties…

One of the few things I miss when winter finally gets out of my face for a few months is hearty soups. So, to celebrate (or bid adieu to) the tail end of the cold and damp, I made just such a hearty (and spicy) soup. I served it to late evening guests recently as a stodgy and substantial — but lively – counterbalance to late evening imbibing. It was very restorative the day after too! I actually served it in tea cups, which was kind of sweet and cozy, and just the right moderate portion for night-time. It’s also easier to handle than bowls when you are sprawled on couches and not seated at a table.

It is another riff on one of my favorite types of soup: a bean, a green and a sausage. This time the bean is nutty, firm garbanzo and the sausage spicy Cajun-style Andouille. The green is kale. If you are not familiar with kale, it is available pretty much year-round, another leafy-green packed with nutrients and fiber and all that good stuff. It is similar to spinach and chard when you cook it, but you have to cook it quite a bit longer for it to soften up. The advantage is that it won’t get mushy in your soup, but will retain a bit of crunchy character. The colors in this one are also really lovely!

Andouille Sausage, Kale and Garbanzo Soup

2 Tbs extra virgin olive oil

1 medium onion, chopped

½ Cup red pepper, chopped

2-3 cloves garlic, peeled and chopped

6-8 oz andouille sausage (or other highly seasoned sausage – I like spicy, but you can use non-spicy too), in ½ inch slices

1 bunch kale, washed thoroughly, stems removed and chopped

2 cups russet potatoes, peeled and chopped into ½ inch squares

32 oz low sodium vegetable broth (or however much broth you have, mixed with water to make 32 oz)

1 15.5 oz can chick peas (garbanzos, ceci), drained and rinsed

2 Tbs fresh thyme or 1 Tbs dried (may be increased or decreased to your liking)


In a large heavy-bottomed pot, heat oil until liquid and fragrant, add onions, stir to coat then reduce heat and allow to soften and become translucent. Add red pepper and garlic and cook, stirring, until softened. Increase heat to medium high, add sausage slices and cook through. Stir in kale and potatoes and coat well. Add vegetable broth and additional water to cover the ingredients. Bring to a boil and reduce heat to a lively simmer for 15 minutes. Add garbanzos and thyme and simmer another 5-10 minutes. Season with salt and pepper to taste and serve with crusty bread/a grating of parmesan cheese/a dollop of fine extra virgin olive oil.

For your reading pleasure: Seasoned Fork

10 Apr

A new soup recipe is in the works, but in the meantime, I’d like to direct your attention to one of my favorite blogs. In the interest of full disclosure, be advised that this is also a bit of shameless self-promotion for the book reviews that I write for the blog, including the one posted today about a collection of stories about real-life gardens and how they feed the soul.

My dear friend, Chef Deborah Rivera Pittorino, has a laid-back boutique hotel and delicious wine bar/restaurant (http://thegreenporter.com/) in Long Island’s North Fork, where real farms and vineyards and aquaculture feed a burgeoning foodie movement while also keeping it grounded in reality and New England-y good sense. It is one of my favorite places in the world (and one day I will figure out how to live there full time). Deborah’s blog has a back-to-the-land vibe with a contemporary perspective that keeps me in touch with the feeling even when I am far away.

I said that I would be directing you to a particular review, but the real bonus is that Deborah introduces it with her own musings on gardening for the restaurant kitchen with her neighbor (who is the same guy who helped me start my first tomato garden when I was neighbor to both, as it happens). It is a very, very nice way to welcome the gardening season!   http://seasonedfork.com/book-reviews

5-minute Meatless Chorizo Quesadilla? Try this!

7 Apr

 My book club has reunited after a winter hiatus. Our first get-back-together was at mine after work and while I wanted to put on a nice spread for these women I adore, I also didn’t want to work too hard. I remembered a puff pastry snack I learned from a Spanish friend, Rosa Cassano. The combination of smoked mozzarella and sundried tomatoes in a melty package tasted astonishingly like Spanish chorizo with pimentón. I didn’t have time for puff pastry, but I figured I could melt them together in a flash on the stovetop in flour tortillas. It worked deliciously as a finger food, as the smoked mozzarella firms up very well after melting. And there truly is no meat in them, though no one will believe you…

 ¡Sabroso! ¡Olé! 

Sundried Tomato and Smoked Mozzarella Quesadillas

Four 8-inch flour tortillas

8 oz smoked mozzarella cheese sliced thin

4 oz sundried tomatoes in oil, drained and chopped

Spritz of olive oil or cooking oil spray.

Heat a small amount of oil in an 8-inch nonstick skillet. Place a tortilla in the skillet. Cover half the tortilla with a layer of cheese and a generous sprinkling of tomatoes, leaving a bit of a margin at the edge. Fold the empty half over, press down and heat through, turning several times during cooking. When the tortilla is just turning golden and stiffening, it’s done. Repeat with remaining tortillas and allow to cool just enough for the melted cheese to firm up for cutting into triangles. Serve with guacamole/salsa/sour cream.

Stir-fried Vegetables (Faster and better than ordering out)

2 Apr

Saturday lunch -crisp and light and zippy

When I am in the mood for some crunchy, spicy Asian vegetables, my first instinct is not to pick up the phone, but to open the refrigerator door.

I am forever buying virtuous items that I mean to use right away, but that slip into the deep recesses in of my mind and the even deeper recesses of the fridge. A good stir-fry is a way to use up just about any crunchy vegetable in a way that will bring the virtue right back (nothing should go to waist or waste!).

Such was the situation today, when my dad started pulling out vegetables for a raw salad, and my mom and I convinced him it would have more flair in a hot and spicy variation.

So we got to chopping and measuring and whisking and in very little time (about 20 minutes) we were crunching and nodding and going for seconds. While there is a place in every household for Chinese takeout menus, it is so easy to make your own, without the gelatinous goopiness that passes for brown sauce, that this is really worth making part of your repertoire. I can see tossing in some peeled shrimp just as the vegetables have cooked in the first step….on this occasion, my dad seasoned and sauteed strips of chicken breast separately as the vegetables were cooking, rather than incorporate the chicken. As a result, the chicken played a gentle counterbalance to the sizzle of the vegetables.

Here’s what we did (adapted from a Cook’s Illustrated recipe for Stir-Fried Broccoli)

Stir-fried vegetables in brown sauce (serves four for a light meal or as a side)

A:

1/2 Cup low sodium vegetable broth

2 Tbs dry white wine (or dry sherry, if you’ve got)

4 tsp low-sodium soy sauce

2 tsp olive oil (or one toasted sesame oil)

2 tsp cornstarch

2 tsp Thai chili sauce (can be increased, depending on your sauce AND your tolerance for hot and spicy; the one we used is already prepared as a marinade, so is sweet. If you use straight Thai chili – like a sambal – it could be stronger!)

B:

6 cloves garlic, minced (you can play with this proportion, especially if your chili sauce has a lot of garlic)

¼ tsp red pepper flakes

2 tsp vegetable oil

C:

2 Tbs vegetable oil

2-2.5 lbs mixed stir-fry vegetables, cut into ¾ inch pieces (we used onions, broccoli, carrots, cabbage, red peppers, green peppers, but you can play around with this!)

½ tsp sugar

Whisk ingredients in A (broth, wine, soy sauce, olive/sesame oil, cornstarch and chili sauce) in a small bowl. In another small bowl, mix up ingredients in B (garlic, pepper flakes, and 2 tsp vegetable oil).

Now for the ingredients in C. Heat the remaining two Tbs vegetable oil in a 12 inch skillet with a heavy bottom, until just rippling and just beginning to smoke. Add vegetables and sprinkle the sugar over, coat with the oil and cook, stirring frequently, for about eight minutes, looking for caramelization on the vegetables. Lower the temperature to medium if you get a lot of sticking.

Push vegetables to the side and add the garlic mixture (B), stir to heat, then mix with the vegetables. Add vegetable broth mixture (A) and stir for a bit less than a minute, or until warmed and the sauce gets a bit thicker. Serve with rice.


Ice Pops (so simple, it’s almost stupid)

30 Mar

From left: apple; cranberry-pomegranate; orange-mango

Here comes the warm weather (I hope, anyway) and with it powerful thirsts. 

For playdates and general snacks, I always have  home-made ice pops in the freezer. They remind me of the limber my abuelita (grandmother) used to make for us when we spent part of our summer with her in Puerto Rico, although she made hers in ice cube trays. She’d fill the trays with different juices, cover the tray with foil and stick sturdy toothpicks through the foil for handles. They were a bit precarious and our hands and arms ended up sticky with juice, but we loved them (and she got us to try different tropical juices that way).

Today I have some ice pop molds from IKEA (I believe they cost $1 for six molds in a little tray) that I keep rotating and filling. I do half water/half juice (because fruit juices have loads of sugar too, albeit natural). Once they have frozen, you can take them out of the tray and lay them wherever they fit in your freezer.

It’s a terrific alternative to ice cream or the commercial colored sugar water in tubes that we often overdose our kids on at this time of year. It’s why Leandro got out of the apple juice-only cycle and into more varied flavors (Abuelita’s wisdom lives on).

I haven’t yet tried to add vodka, as I am afraid I might hand the wrong pops to the kids in a playdate frenzy, but I bet you could!

Banana Bread – Share the Love (Easy Family Baking!)

28 Mar

I’ve never been much of a baker – I’ve probably mentioned that I am no good at following instructions – but this banana bread is very forgiving of people who are more “more or less” than precise.

It’s very child-friendly. Leandro and I put it together often and he takes slices to school to dip in yogurt. I especially like to double it (using about 8 bananas total) and slice up some for his caregivers and my colleagues – everyone feels appreciated and esteemed when they are on the receiving end of home-baked loaves of something. I get a lot of requests for this recipe, so here it is! It also freezes well; check the bottom of the recipe for storing instructions.

Easy, Moist and Yummy Banana Bread

4-6 overripe bananas*

1 Cup sugar (1/2 light brown and ½ white works well, but any combination will do; we’ve used a bit of dark brown as well)

2 eggs, beaten

½ Cup vegetable oil

2 Cups flour (up to one cup whole wheat, but beware stone-ground as it may be too coarse)

1 tsp baking soda

¼ tsp salt

Preheat oven to 350°. Mash bananas in mixing bowl. Add sugar, eggs and oil, one at a time, mixing well with each addition. Sift dry ingredients together (I use a big strainer) and add to banana mixture. Pour in greased 5×9 loaf pan (or 8×8 oven dish) and bake 55-60 minutes, or until a knife inserted in the middle comes out clean.

*We eat a lot of bananas here, but sometimes I buy too many and they get overripe, even for my son, who likes them sweet and eats the dark spots. Or he just wants half of one and I don’t want the other half. Any overripe or half-bananas get thrown into a plastic freezer bag and when I have approximately six, I make banana bread!

Storage notes: Banana bread should be cooled completely before slicing (I know, fresh-out-of -the-oven warm is so cozy! But it slices much better later on). It stays fresh tightly wrapped out of the fridge for two or three days. The refrigerator isn’t great for it, but you can warm it up a bit before serving. To freeze, slice first, then wrap in foil or plastic wrap and then place in a freezer bag. It’ll keep for at least a month and you can take out a slice at a time when you need a treat.

Skagen Salad; Scandinavian Shrimp Salad (dill-icious)

25 Mar


Creamy, sweet, tangy, chunky, light


 This is how the stars aligned. The Girl With the Dragon Tattoo got my friend, Ashley, in the mood for Scandinavian food. I had a couple of bags of frozen shrimp and prawns in the freezer and a hankering for dill. It was the third Friday night of Lent  (which I take to mean that God wants me to be creative with seafood). My Swedish sister-in-law has instructed me in the mystical art of extracting relatively authentic Swedish flavor from American ingredients (yes, IKEA plays a critical role). Thus, the following shrimp salad became the basis for a minimalist Swedish tapas night.

We also had brie on pumpernickel toast topped with lingonberry preserves (like I said, IKEA is crucial here) and, since this is being written in real time, there may be some herring and smoked salmon later on, although as there is no more sauvignon blanc to accompany it, maybe not.

This is really quick to make and yet is cool, unhurried and elegant. Maybe one day I will start playing around with the sour cream and mayo proportions and use plain nonfat yogurt, but virtue is not one of my virtues at the moment, so here it is in all its lush glory.

Scandinavian Shrimp Salad

4 Cups peeled, cooked and deveined shrimp (your choice of size*), chopped into small chunks

¾ Cup sour cream

¼ cup mayonnaise

½ cup red onion, minced

½ cup dill, finely chopped

3 Tsp lemon juice

Mix all ingredients together in a bowl, leaving lemon juice for last, salt to taste and serve with toasted pumpernickel , crisp crackers or atop a salad.

*My sister-in-law Annika, who is actually Swedish, was the one who found the original recipe that this is based on. For her, the flavor is not authentic unless you use those tiny, coldwater cooked and peeled Greenland Prawns that she gets in frozen 500g bags from IKEA. It is true, they have a distinctive sweet tang that regular bagged supermarket shrimp don’t, but I don’t like their texture thawed. So I use a strainer to dip them in the same water the rest of the shrimp are cooking in for just a minute which tightens them up without losing too much flavor. I use one bag of the tiny prawns and about a pound of other bagged shrimp (works out to half and half), but you can use whatever you have on hand.

Tuna, Apple and Macaroni Shell Salad – luncheon, potluck, picnic, or BBQ fare

22 Mar

Just like mom used to make!

I needed a quick dish for the first potluck of the season at our new CSA (Restoration Farm at Old Bethpage Restoration Village http://www.restorationfarm.com/). Normally I would do something more elaborate and planned, but the boy and I had been home sick for a couple of days and then busier than we should have been, given that we needed some recovery time, and then plain old sick of one another…just star-crossed and cross and no way was I going to a store to get any ingredients.

Then I remembered a  favorite warm weather dish that my mom would make for backyard barbecues and the like. This tuna and macaroni salad involves minimal prep and I usually have all the ingredients in. It’s creamy, but the apples provide crunch and tang, and each bite is texturally entertaining. My brother and I would just gobble it up (with extra mayonnaise, of course), delighted when two or three shells were cradled together for a really pasta-y morsel.

So I put it together in a jiffy and we took it on down to the gathering (where there were loads of other good things to eat that I need the recipes for!) and were so pleased to see many old friends of the good eating, farming persuasion…well, I was pleased, but it was not Leandro’s finest hour and we left in rather a messy, huffy hurry…anyway…the salad worked out fine and I had leftovers for lunch on Monday.

If you are observing Lent, consider it for a fast Friday fix that is balanced enough to be a one-dish meal. Thanks Mom!

Myrna’s Tuna and Macaroni Shell Pasta Salad

1 lb. medium macaroni shells

½ Cup of each the following chopped into fingernail size bits: carrots; celery; white or red onion

1 Cup Red Delicious/Macintosh/Granny Smith apple, unpeeled, chopped into fingernail size chunks

1 5oz can your preferred tuna, drained

6 Tbs mayonnaise

2 Tbs plain nonfat yogurt (low or full fat okay)

1-2 Tbs prepared mustard

Cook shells according to package directions. Mix all ingredients in a bowl. Serve at room temperature. You can also eat it as leftovers, but you will probably want to add a bit of mayo, as the pasta tends to absorb the mayo over time.

Bacalao a la Vizcaribe (A classic cod dish reconstructed)

18 Mar
Scoopable cod!

For all these years I thought I was making bacalao a la vizcaína (salt cod, biscayne or vizcayan style), when I was really making a sort-of bacalao guisado (stewed salt cod)! I only found out yesterday, as I started soaking the cod for another Lenten Friday of fish. “Let me see how Valldejuli and Cabanillas make it,” I thought, referring to two classic Puerto Rican cooks whose recipes I have lived by over the years.

I expected some inspiration for innovation, but what I got was comeuppance. I was so shocked by what I found that I checked Penelope Casas’ more Iberian, continental recipes for the dish. And it turns out that what I have been telling people is my “Bacalao a la vizcaína” is actually something else, but not quite.

So, I am a little embarrassed, but nevermind, my bacalao dish is really good and easier than pie. It makes my parents happy. And, apparently, it is my own. Thus, the silly name change.

I hope to try the real vizcaína later in Lent (it looks to be even easier than my version), but for now, this one is more than satisfactory and includes much of the same things: salt cod, onions, garlic, tomatoes, raisins, capers. It’s got salt, sweet and spice (if you like). It is rich without being heavy. This is a stew that goes well with rice, with potatoes (dressed with parsley and olive oil), with avocado and with hard-boiled eggs. It also goes well with Mark Kurlansky’s incredibly entertaining book Cod: A biography of the fish that changed the world which will enlighten you about why so many peoples in this world will go through the trouble of desalinating and cooking such a strong-tasting, strong-smelling fish. If you come from a seafaring nation, particularly bordering the Atlantic/in the Caribbean, it is part of you and you just can’t help it.

Bacalao al la vizcaribe

1-1.5 lbs salt cod, soaked overnight in cool water and then some more the next day, with at least two changes of water*

3 Tbs extra virgin olive oil

1 large onion, finely diced (yellow or big, fat, sweet are recommended)

1 green cooking pepper (cubanelle, Italian), finely diced

1 red pepper, finely diced (and a tsp of red pepper flakes, if you are so inclined)

4-5 cloves garlic, minced

1 24oz can peeled, diced or pureed tomatoes, chopped if necessary

¼ cup raisins

1 heaping Tbs capers, drained indifferently

15 green pimiento-stuffed olives, drained indifferently

Accompaniments: (choose one or more, mix and match) four hard-boiled eggs, sliced in half; avocado slices; boiled potatoes dressed with parsley and olive oil; rice; crusty bread toasted)

Heat olive oil in a pot on high and add onion. Stir to coat, then lower heat to medium and sauté until wilted. Add peppers and garlic and sauté another five minutes or more, until translucent.  Add the tomato and bring to a boil. Add cod (no need to break it up; it will fall apart in the cooking and stirring), raisins, capers and olives, lower heat and simmer (covered if it is not very liquid; uncovered if it seems very watery) for at least 20 minutes at a gentle bubble, stirring occasionally. Serve with you choice of accompaniments.

*Many people are afraid of salt cod or bacalao because of the salt. I find that an overnight soak with several changes of water does the trick. But if you forget to soak it the night before, boil a pot of water, drop the bacalao in for five minutes, drain and rinse thoroughly and you should be fine.   I actually add salt sometimes in the end!)