

When I was a kid, I love-love-loved Campbell’s Tomato and Rice Soup, the kind from the can that you just added water to and stirred around on the stove top for a while. Holy Happy Meal, Batman, with a couple of saltines on, that was the best stuff ever to slurp on a fall day, and best of all, I could do it myself from a young age. Don’t ask me how young, because I don’t remember! But it was a handy thing to make, and it got you tons of labels for your school back in the day. Ah yes, the Campbell Soup Label Drives…. Continue reading
Archive | Uncategorized RSS feed for this section


Blackberry Bonanza: Syrup, Martini, and Lemon Iced Tea (plus a lesson in empirical evidence)
27 Aug
There is currently a beautiful blackberry crop at Restoration Farm (our C.S.A.) and there’s nothing more fun than walking down to the berry patch and picking a pint or quart of berries with your kid in a bucolic colonial setting.
 You know which berries are ready because they are dark, dark, dark (which I suppose explains why they are called blackberries; I am a genius) and also, when you are harvesting, the ripe ones don’t resist a very gentle tug, but slip right off the bush into your fingers sans stem and core. If they resist, it is not because they are being difficult, but because they simply do not want to deliver themselves to you at anything less than their peak. Continue reading
Everything Must Go! How to make a mad-mixed pasta sauce to eat now/freeze for later)
22 Aug
We are drowning in abundance. It happens every August if you garden or belong to a CSA; there are so many tomatoes, so many peppers, so much zucchini….it all gets lost in the fridge faster than you can cook it!
So, with pick-up coming the next day and a fridge full of last week’s haul getting ugly, I took as much as I could and cooked it down into sauce – some for now and some for the freezer, in small containers that will make a fast meal when school starts and dinner needs to be now and lunch needs to be ready the night before. I have freezer-packing panic!

Blanche! (Tennessee Williams moment)
Here is an Everything Must Get Used Before Our Next Pick-Up tomato sauce recipe. I used SunGolds, cherries, paste tomatoes, slicers, heirlooms, anything that had been sitting all week getting sad.
 How-to for blanching tomatoes follows the recipe….
 Everything Must Go Pasta Sauce
3 Tbs extra virgin olive oil
1 Cup onion, chopped
6 cloves garlic, chopped
1 red bell pepper, chopped
2 green peppers, chopped
3 carrots, chopped
3 stalks celery, chopped
(Optional bits and bobs: half a zucchini, a bit of eggplant – bung in anything that will cook down soft and not mess up the overall color too much — chopped small).
6 lbs tomatoes (paste tomatoes preferred, but I used an incredible mix), cored, blanched and peeled*
1 Tbs dried oregano and thyme (2 Tbs if using fresh)
¼ Cup red wine
½ tsp salt (or to taste)
Heat olive oil in a heavy-bottomed soup pot at medium high until liquid and fragrant. Lower heat to medium and add the following vegetables one at a time, stirring to coat before adding the next: onions, garlic, peppers, carrots, celery. Cook at medium (or lower if you have time) until vegetables are soft and translucent, at least five minutes. Add tomatoes and bring to a boil. Add herbs and wine and lower to a lively simmer. Cook down for at least 30 minutes, stirring occasionally. The more you cook it, the smoother it will get, but also the more dense. Add water 1/4 Cup at a time as desired.
(Optional step: Using an immersion blender, liquefy the sauce to desired smoothness)
Correct seasoning and serve over pasta/freeze for later! Will keep three months in the freezer.
To blanch, keep reading!

A pile of peels
*To blanch and peel tomatoes: Bring two quarts of water to a boil. Meanwhile, core the tomatoes (take out the stem and white core with a paring knife) and prepare a large bowl of ice water. When the water boils, drop tomatoes in. In two minutes (or less) you will see the skin begin to peel back or split. Remove each tomato as this happens and drop in ice water. When tomatoes have cooled, take them out of the ice water and peel (the skin should come off easily). They are then ready to cook down, or freeze in freezer bags for later use (later can be as long as next spring! and you don’t have to peel them if you are freezing for later use).
Simple Caribbean Chicken Noodle Soup (throw it all into the pot at once! Serves four as a main course))
19 Aug
Yeah, yeah, your grandmother’s chicken soup. I know. It was the best. Could raise the dead, in fact.

Just five minutes of chopping, and throw it all in the pot! No browning, no saute, no mirepoix, no sofrito, no roux.
Well this chicken soup may not be your grandmother’s, or even your mother-in-law’s. It may not be complex, may not feature a rich and dense stock, may not have anything at all fancy about it. But if you want to just throw a bunch of things in a pot and end up with a soothing, yummy, cure-all of a soup in less than a half hour, I think you will like my soup a whole lot. It’s a typical Puerto Rican and, apparently Aruban, style of soup prep.

The first tender tropical culantro leaves from a container on my Long Island stoop!
Important note: in this soup, my herbs were the first recao (culantro) I was able to harvest from the seeds I brought from Puerto Rico. You do not need them to make this soup – choose whatever you most like in the green herby kingdom – but I want to share with you my satisfaction at growing, on my stoop, one of the most distinctive elements of Puerto Rican cuisine. Eryngium foetidum – also known as recao, culantro and sawtooth coriander — is something that smells delicious in the rain, that tastes similar to cilantro, but is less citric and a bit deeper.

And another view of the recao…yes, I am inordinately proud…
I grew it at my grandmother’s house in Mayagüez from seeds from my great-aunt Amida, but have struggled to get it to grow here on Long Island. Thanks to a mad-humid summer, it has flourished in a container and I am very happy not to have to buy it already cut and fading in flavor from the local Latin grocery that gets it from Costa Rica. ¡¡¡¡TRIUNFO!!!

Comfort in a pot
No-Fuss Chicken Noodle Soup (amounts of vegetables are flexible)
2 quarts water (with a stock cube) or stock (or a mix of the two)
1 medium onion, peeled and chopped
2 stalks celery, chopped
2 carrots, peeled and chopped
3 cloves garlic, peeled and chopped
1 green pepper (preferably cubanelle or Italian cooking pepper), chopped
1 lb chicken breast (or boneless thighs), in 1’ cubes
1 Tbs herbs of your choice, chopped (especially culantro/recao/sawtooth cilantro)
Handful of soup noodles (fideos)
Salt to taste
Bin a large stockpot, bring water/stock to a boil. Add remaining ingredients, except noodles and salt. Return to boil. Lower heat to a lively simmer for at least 20 minutes. The longer you have the more tender the chicken. Add noodles five minutes before you finish simmering. Salt to taste and serve. I recommend adding hot sauce, like sriracha, to taste!
“Mom. Blog This. Right Now.” (Leandro Makes His First Pesto and Wants You To Know How Great It Was)
11 Aug
It is high season for basil, which means high season for pesto. I forgot to pick up basil from the farm this week, but one of the neighbors’ friends, in gratitude for Sangría Night, sent some over from the overabundance in her own garden.

From Lindsay’s Garden
Between that and my little plants scattered around the yard, I had enough for a quickie pesto for Leandro’s couscous.

From our garden – not the greatest shot, but the other ones showed all the perforations from unknown creatures feasting merrily on my herbs!
And then, BONUS! I had Leandro making his own dinner! He loves the smell of basil, but what he truly couldn’t resist was a go with the pestle. Nothing like offering a five-year-old a club and saying “Have at it, kid. Call me when you’ve beaten this stuff to a pulp.”

The Little Chef at work
He was tremendously excited at every turn, making me smell all the different aromas as we added ingredients to the mortar. We mixed it into couscous for lunch with the grands and wasn’t he so proud to have made The Best Pesto Ever? We were proud too and it really was delicious. I also used some of it to spread on roasted eggplant, peppers and zucchini. What a terrific lunch! And a wonderful kitchen experience!
 Note the unorthodox use of walnuts (Poor Marcella Hazan; I use her The Essentials of Classic Italian Cooking all the time, but never quite stick to the classical line). I can’t afford to keep pine nuts around so walnuts were a worthy and handy substitute. (Mind you, with the price of walnuts rising — around $18 now for a 3-lb bag at Costco these days, up from $15 not too many months ago — who knows how long I’ll be able to afford those!). Also, this recipe can certainly be increased; I only had a cup of basil.

With Couscous
Hand-Ground Pesto (Mortar and Pestle needed)
1 Cup basil leaves, tightly packed (washed in cold water and patted dry)
1 clove garlic, smashed and peeled
2 Tbs walnuts
Coarse sea salt (pinch by pinch, to taste)
¼ Cup freshly grated parmigiano reggiano (additional Tbs romano cheese optional)
¼ Cup extra virgin olive oil
In a mortar and pestle (marble mortar with wooden pestle is what Marcella Hazan recommends; I use all marble) grind basil leaves, garlic, walnuts, and sea salt into a paste. Add cheese and use pestle to mix well. Add the oil in a thin stream, mixing well with a wooden spoon.
If using pasta, this amount will suffice for about a pound, Reserve some of the pasta cooking water to thin the pesto as you turn it into the pasta. If using couscous, start with two Cups dry (Israeli-style couscous – the big kind – preferred)

On stacked grilled veggies
Golden Tomato Pasta Sauce (freezeable! or make from frozen tomatoes…)
30 Jul
“Tis the season for the tomatoes to overwhelm. In fact, last year we were so overwhelmed that I had tomatoes in the freezer all winter. The texture isn’t as good as in the middle of summer, but the incomparable bright, fresh flavor is still there.

Yes, these icebergs are actually frozen golden tomatoes (yellow seems a bit more prosaic here). The freezer burn was minimal and the flavor was great!
So this is a terrific simple sauce that you can make from frozen or fresh. Instructions for blanching appear at the end!

Golden Tomato Sauce
Golden Tomato Pasta Sauce
¼ Cup extra virgin olive oil
1 Cup shallots, chopped
¼ tsp hot red pepper flakes
1 Tbs oregano (less if oregano is not your favorite; this is a pretty generous amount)
Pinch sugar
5 lbs golden tomatoes, cored, blanched and peeled*
10-20 basil leaves, chopped
Heat olive oil at medium-high in a heavy-bottomed soup pot until liquid and fragrant. Add shallots, stir to coat and lower heat to medium low. Cook, stirring occasionally, until shallots are soft and translucent. Stir in hot red pepper flakes, oregano and pinch sugar and cook one minute. Add tomatoes, bring to boil then lower to a lazy simmer and cook for an hour or until fat begins to separate from tomatoes and you have reaced desired consistency. Add basil leaves and cook for an additional five minutes. Serve over pasta, as pizza sauce or on bruschetta, or freeze in quart containers for another day.
*To blanch and peel tomatoes, set a big pot of water to boil. In the meantime, core the tomatoes and fill a big bowl with ice water. When the water is boiling, drop tomatoes in so they fit comfortably. They blanch in under a minute, generally. As soon as you see the peel start separating from the flesh, pull them out and drop into the ice water. You can leave the peel on if you are going to freeze them (in gallon freezer bags is fine) or peel once they have cooled to use immediately.
We Make You Look Good: Mussels Vinaigrette, Spanish-Style Tapas, Party Snacks
24 Jul
Some things are worth repeating.
Full disclosure: I have posted a close relative of this recipe before. That was a long time ago, the early days of this blog, and this is slightly tweaked, plus the photos are new (since I made it again for a visit from my sister-in-law and niece).

Mussels Vinaigrette (make ahead!)
They are still the best damn mussels I have ever had and you should know about them, because they are also extremely easy to prepare and can be made the night before any big affair. (Washing out the shells takes a bit of time, but it is satisfying and mindless work that can be done while sipping a glass of something and chatting companionably with whomever is around).
Served cold and slurped right from the shell, they are a stupendous appetizer in looks and flavor. Want to impress? These are your bad boys.

Mejillones a la Vinagreta (Mussels Vinaigrette). Make Ahead!
(serves 4-6 as an appetizer. For more guests, double the mussels, but just half again of everything else)
1/2 cup olive oil
3 Tbsp red wine vinegar
heaping Tbs small capers
2 Tbsp minced red onion
1 Tbs minced roasted red peppers (you can also use jarred pimientos, the sweet kind)
1 Tbs minced parsley
pinch of salt and a grinding of black pepper
2 lbs mussels in their shells
1 slice lemon
Whisk the oil and vinegar together, then add the capers, onion, peppers, parsley, salt and pepper. Put the mix into a large freezer bag (if you need this dish to be portable)
Boil one cup of water in a big pot with the lemon slice. Add the mussels and bring to a boil, covered. Pluck out the mussels when they open (waiting until the meat separates completely from the shell into a little sausage shape and then pulling out immediately) and put in a separate bowl to cool. Discard any mussels that do not open after ten minutes. Remove the mussel meat and put into plastic bag with the seasonings and refrigerate.
Save half the mussels shells and clean well (this is the tedious part; make sure you have good music on). Put in a plastic bag and refrigerate.
To serve the next day, arrange shells on an attractive and large platter and put one mussel in each. Spoon the remaining seasoning over each.
Chickpea and Tahini Salad III (Perfect Picnic Salad)
21 Jul
I am forever putting together cold chickpea salads for the summer.
Tahini is, of course, one of my favorite condiments for this purpose. For the uninitiated, it is a sesame paste, very thick, that keeps for a long time in the fridge and is critical to Middle Eastern cuisine. A tablespoon adds a depth of flavor, a teeny bit on the bitter side, and a thickness or creaminess of texture to sauces and dressings that I like a lot. Try a basic dressing from a Mediterranean Buffet , a version with soy sauce, or another with tomatoes and herbs. Which I guess means I should call this Chick Pea and Tahini Salad IV, but whatever!)
This time I had dill in the fridge needing to be used up so I figured I would try it. The result was fresh and good. Mint would be a terrific substitute or addition. You can really go in many directions with this one! You can mix it with rice or use it to top a green salad or just eat it right out of the mixing bowl with a spoon while standing in front of the fridge (not that I would ever do that. Uh-uh. Not me).

Light and fresh – perfect side for supper!
Chickpea and Tahini Salad III
1 Tbs lemon juice or red wine vinegar (start with half a tablespoon and increase to your taste)
1 Tbs tahini
1 Tbs extra virgin olive oil
1 Tbs dill, chopped
28oz can chickpeas, rinsed and drained
2 cloves garlic, minced
2 Tbs red onion (a quarter of a medium red onion), sliced thin
Mix or whisk lemon juice or vinegar and tahini together in a bowl. Add remaining ingredients and stir to mix well.
Sauteed Golden Beets with Olive Oil, Garlic, and Parsley
18 Jul
If you are a glass-half-full kind of person, our beet harvest was great. If you are a glass-half-empty kind of person, then it pretty much sucked.
What happened was that each beet seed actually contains as many as eight little beet plants waiting to happen. We didn’t really understand that, didn’t thin them enough and ended up with fantastic, lush beet greens, but nothing at all in the root department.
Observe the only three actual beetROOTS we managed to harvest

Tiny, right?
If that doesn’t give you an idea, how about this comparison with our largest beetroot, and a golden beet from Restoration Farm (our CSA).

David and Goliath
But, the three little beetlets were very tasty…me, Pedro and Myrna each got a bite and what we got, we liked.
However, let’s go to the issue of the LARGE Golden Beets. We got a nice bunch from the farm and while I love my other recipes: with beet greens and orange, or with goat cheese, I wanted something new and easy. The beauty of beets is that you can roast them ahead (preferably in the cool of the evening) and make the dish a couple of days later. This was light yet satisfying and quite effortless. Pretty too!
 Sauteed Golden Beets with Olive Oil, Garlic, and Parsley (inspired by Vegetables by James Peterson)
2 lbs beets, roasted and peeled*
2 Tbs extra virgin olive oil
3 cloves garlic, minced
1 Tbs finely chopped parsley
Salt and freshly ground pepper
Slice the beets into rounds, between ¼ – and ½ -inch thick. Heat olive oil in a sauté pan over medium heat until loose and fragrant. Add garlic. When garlic begins to sizzle, slide in the beets and stir gently to cover. Cook for about five minutes, just to heat beets through. Sprinkle the parsley, salt and pepper over, cook for one more minute and serve.
*Beets are easy to roast. Preheat oven to 425°. Wrap unpeeled beets (with about an inch of stem) individually loosely in foil and roast for about an hour, until a fork goes through foil and beet easily. Allow to cool and then peel.
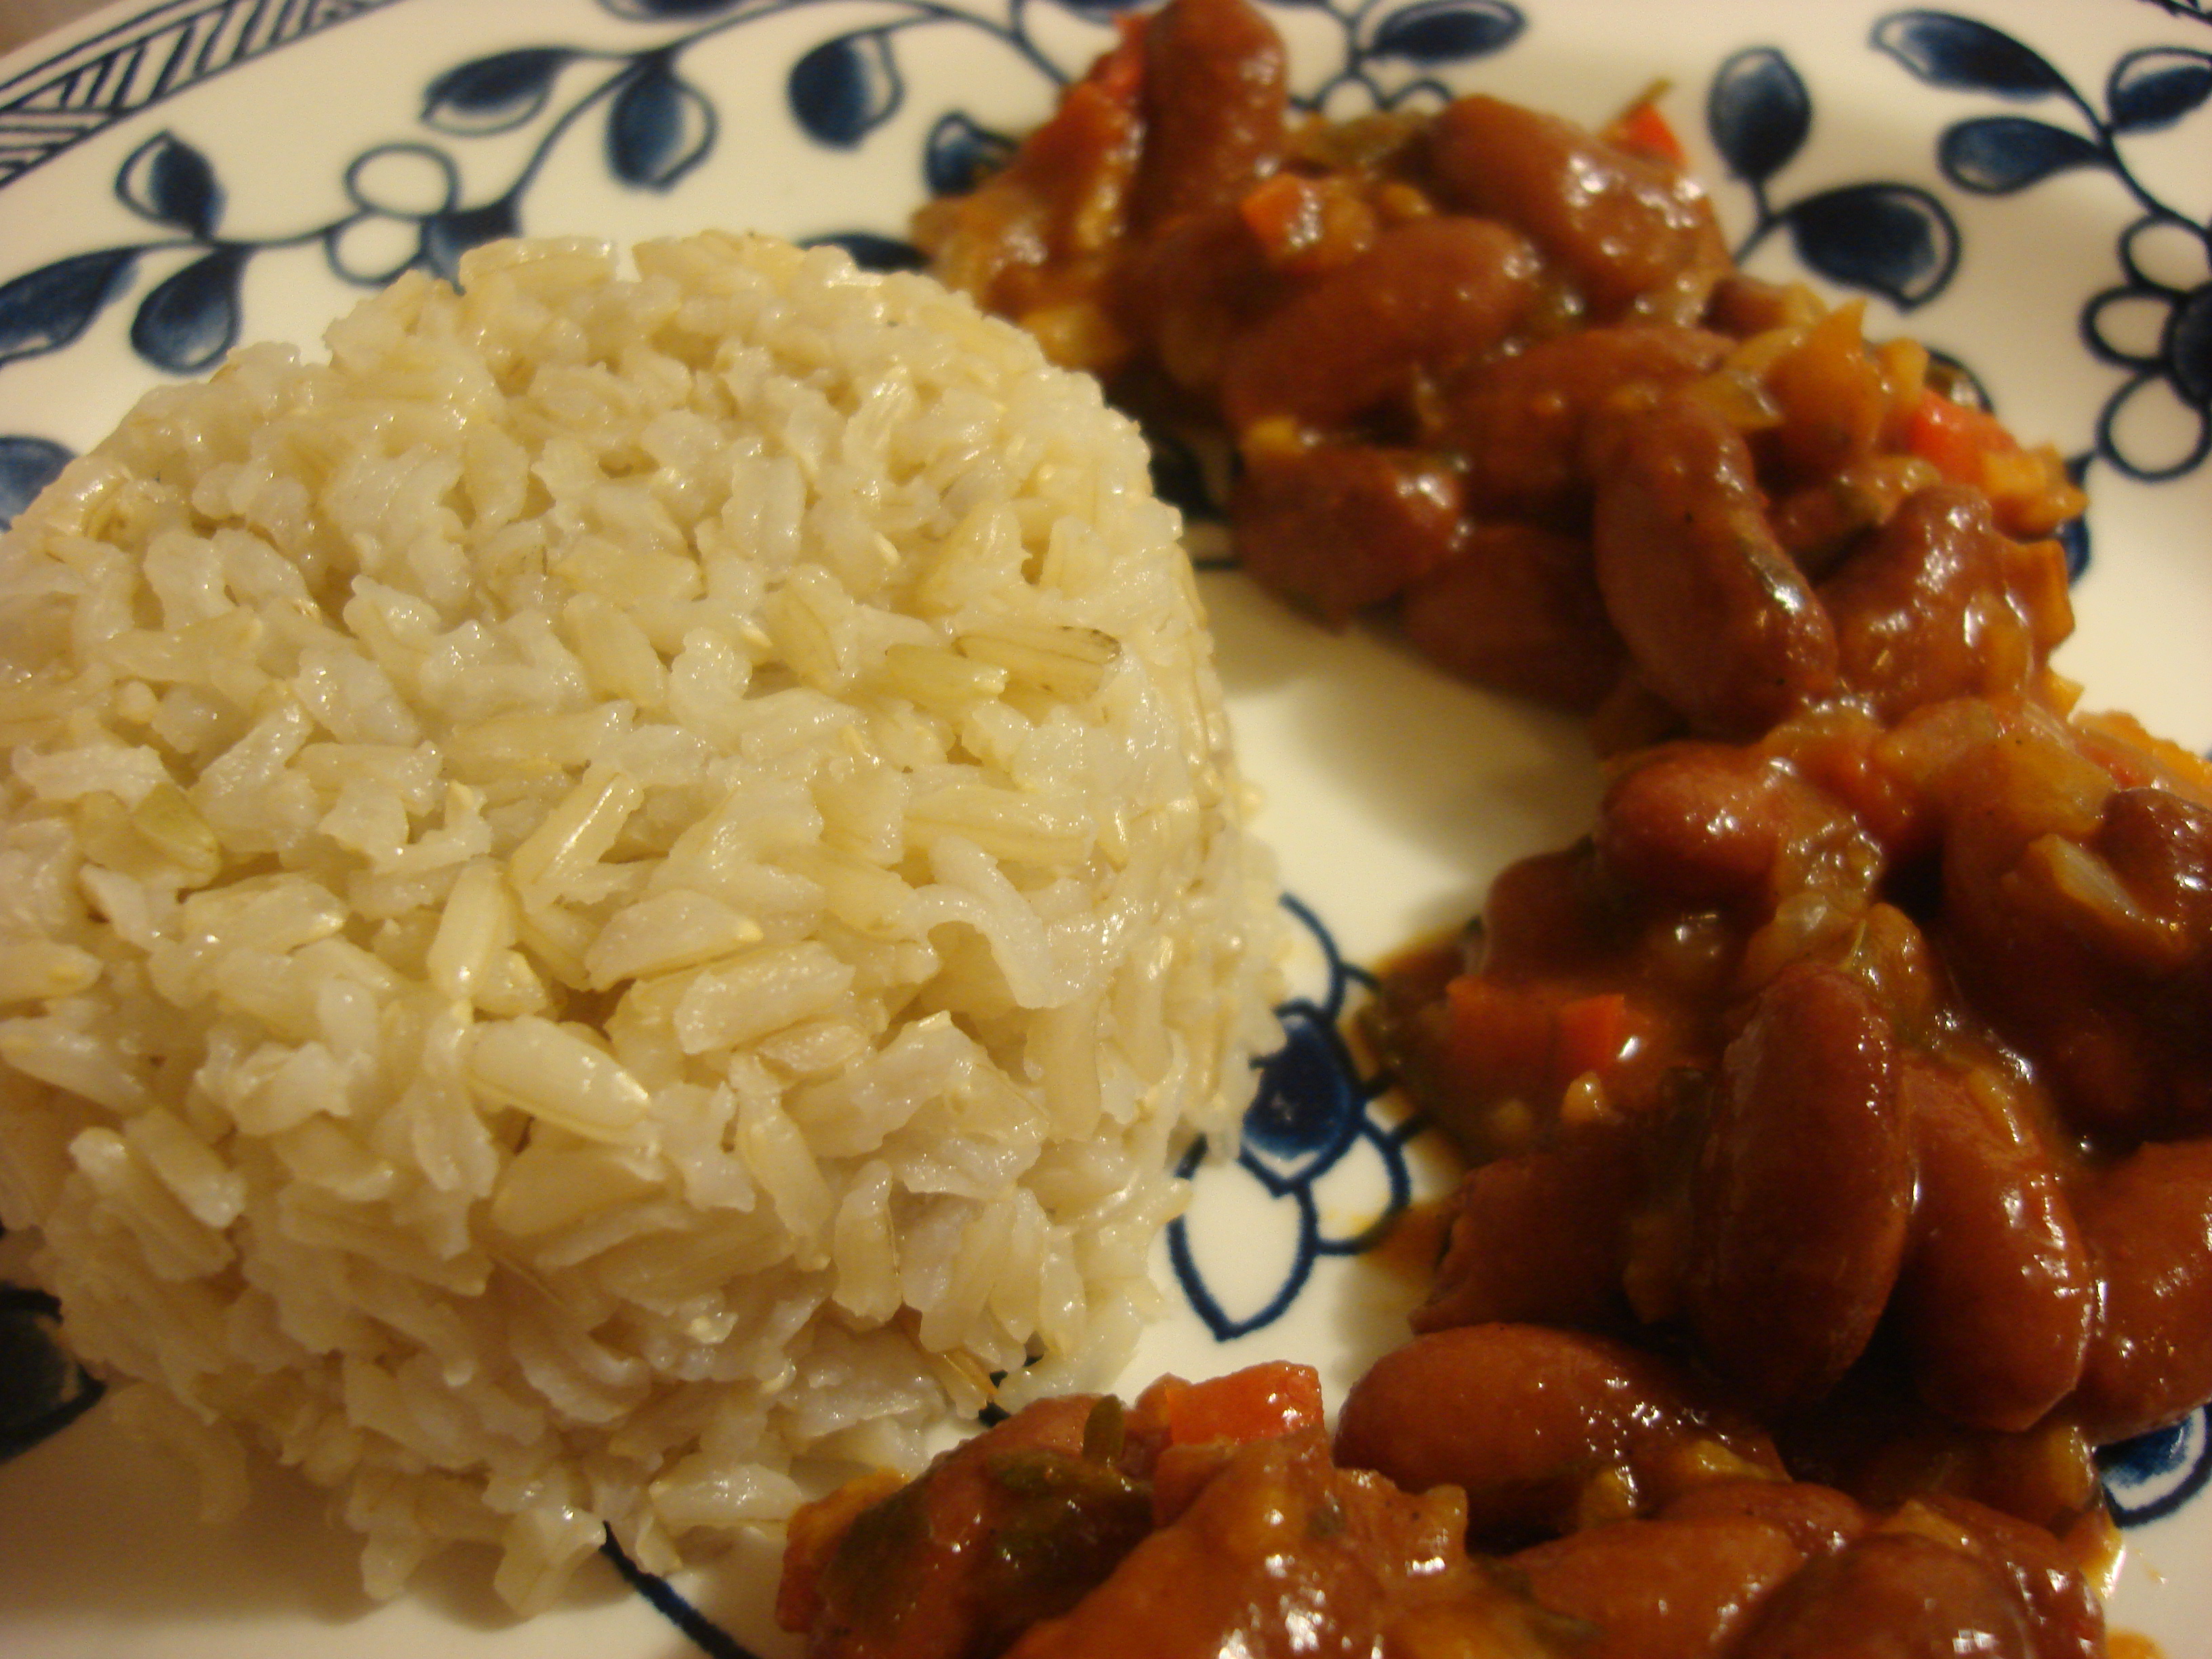
Vegetarian Chili (or, yet another good bean recipe!)
16 Jul

I hesitate in summertime to do beans from dry because I don’t want to simmer anything for an hour in this heat! (I am sure a slow-cooker would be a solution, but I don’t have one and don’t have room for one). So, it’s cans for me, and if they have a pull-off top, even better. I want to minimize all movement in the Hazy, Hot, Humidity of a Long Island summer (Ditto for wine bottles…a screw top is high up on my ratings rubric right now; corks take too much work!)
In fact, I want to keep cooking to a minimum, so rather than season my ground beef or even have to defrost and simmer the pre-made stuff I have stocked in the freezer, my “chili” has gone vegetarian. I call it “chili” because I add chili powder, but I make no claims to authenticity. If you want to call it rice and beans with chili seasoning, by all means do. “That which we call a rose by any other name would smell as sweet,” to quote a certain lovelorn 13-year-old from Verona.
Whatever you call it, it will be ready to eat in about 15 minutes, and I call that fast!
 Vegetarian Chili (or rice and beans with chili powder!)
1 Tbs olive oil
½ medium onion, chopped fine (about 1/2 Cup)
½ medium red bell pepper chopped fine (about 1/2 Cup)
3 cloves garlic, minced
1 heaping Tbs tomato paste
15.5 oz can red kidney beans, rinsed and drained
½ tsp oregano
½ tsp chile powder
2 tsp chopped fresh cilantro
1 tsp thyme
Pinch red pepper flakes
1 bay leaf
Salt to taste
Heat olive oil at medium-high in a saucepan until loose and fragrant. Add onions, stir to coat and reduce heat to medium. Add red pepper and garlic and sauté for 5 minutes, or until vegetables are translucent and soft. Add tomato paste, stir in to coat and cook for a minute. Stir in beans, oregano, chile powder, cilantro, thyme, red pepper flakes and bay leaf. Add ½ Cup water (more, if you want it more liquid) and cook for 15-20 minutes. Salt to taste and serve with white rice or wrapped in tortillas with cheese, shredded lettuce, salsa and all that fun Mexican restaurant-type stuff.
Natalia de Cuba Romero
Great food - Simply
Eat Your Way Through Puerto Rico: Chow Like a Native

Click on the image to purchase at the iTunes store!
Unlock the Language of Puerto Rican Flavor
Click on the image to purchase the Kindle Edition!
¡Comida Hispana! Recipes to unleash your inner Latino
-

Mango Mojitos With Ancho Chili Salt
It was another summer Friday in the neighborhood and that called for another festive cocktail. Riding high on the success of last session’s passionfruit mojitos, I decided to make mango mojitos. The drink itself followed much the same construction, but the mango was decidedly sweeter than the passionfruit, so I decided that it needed a […]
-

Passionfruit Mojitos by the Pitcher or Glass
Summer evenings in the neighborhood can be wonderful. Occasionally on a Friday some of us neighbors bring out folding chairs and sit together in one front yard for a bit of happy hour while the kids go mental on someone else’s lawn. It’s pretty much BYO, but we do mix up a pitcher of experimental […]
-

KID IN THE KITCHEN: Tembleque (Tropical Coconut Pudding)
We spent the better part of last summer in Puerto Rico, and among the tasty things that my little guy fell in love with was tembleque, a jiggly (temblar means to tremble) dessert that falls somewhere between pudding and flan. I promised him we’d make it back in New York, and this weekend, for a […]
-

Sangría Tropical (and rainforest paradise pictures)
When the heat gets tropical, so should the drinks. On a recent trip to the mountains of Puerto Rico, I was inspired by a wonderfully cooling and exotic sangría I had up around and about El Yumque (Caribbean National Forest, the only tropical rainforest in the U.S. Forest Service system) at Noelia’s, recommended to us […]
-

Salmorejo de jueyes (Land Crab Stew)
There are a number of land crab species skittering about Caribbean coastlines. Some are edible and the one we eat most here in Puerto Rico (although I am told they mostly are imported from Venezuela these days) is Cardisoma guanhumi which we call juey and — if you are English-speaking — you might call the […]
Foodie Blogroll
Rights

Hot, Cheap & Easy by Natalia de Cuba Romero is licensed under a Creative Commons Attribution-NonCommercial-NoDerivs 3.0 Unported License.
Based on a work at hotcheapeasy.com.
Permissions beyond the scope of this license may be available at http://hotcheapeasy.com.
