Tag Archives: food

The Best of 2011 – closing the year with my Top Five

31 Dec

Thanks to all my visitors  – regular and occasional – for a great year of cooking!

Unlike the rest of the year, this week has been a slow one for culinary adventure (I’ll explain that one later), so rather than do nothing, I’ve collected this year’s top five recipes – the ones that get hit time and time again to let you know what other folks are trying out in their kitchens.

I hope you will give them a try…and I will certainly try to do more things using these ingredients that you loved!

Best wishes for a wonderful and delicious New Year!

Natalia

NUMBER FIVE

Oatmeal, Cranberry, Raisin, Walnut Cookies (click name of dish for recipe!)

NUMBER FOUR

Cheesy Broccoli and Chorizo Pasta (click name of dish for recipe!)

NUMBER THREE

No-Crust Broccoli and Feta Quiche (click dish name for recipe!)

NUMBER TWO

Pastelón de Yuca (Puerto Rican Shepherd’s Pie) (click name of dish for recipe!)

NUMBER ONE!!!!!

Yuca en Escabeche (Yuca Salad) (click name of dish for recipe!)

Roasted Baby Lamb Chops – Straightforward and Perfect

25 Dec

“Mommy, I love these! I just love them!”

Here is yet another cameo appearance by Adriana, whose baby lamb chops sent Leandro over the moon (not least because he could grab them by the bone in his hammy little fist and tear meat off with his teeth like a caveman) and very nearly knocked me and Padushi off our pedestals in his culinary pantheon.

Adriana is a serious carnivore who likes the flavor of good meat to shine through. The mild flavor and tender texture of today’s baby lamb chops from Australia and New Zealand lend themselves to that kind of light hand in seasoning. Roasted potatoes and asparagus rounded off the meal – simple, straightforward, and balanced.

The meal was also festive — our celebration of the beginning of the holiday season —  so we grown-ups opened with a pear and goat cheese appetizer (which will be familiar to regular readers) and some prosecco, which I mention only because the photos are so nice that I’ve decided to include one here! The kids…well they opened with some sort of Trader Joe’s-type semi-virtuous cheese doodles, so we’ll just leave that one alone! And they did great justice to the real food, so not to worry!

Wishing you happy and delicious holidays!

Natalia

Adriana’s Baby Lamb Chops

7 cloves garlic

1 tsp whole black peppercorns

2 medium springs rosemary – stems removed and leaves minced

¼ tsp salt

3 lbs Frenched baby lamb racks (two racks)

Adobo powder to taste

½ Tbs extra virgin olive oil

Pound garlic, peppercorns, rosemary leaves and salt in a mortar and pestle until they form a paste.

Rinse lamb racks and pat dry. Sprinkle liberally with adobo powder on both sides. Massage both sides with garlic rub, concave side first.

 Preheat oven to 425°.

Heat  olive oil in a cast iron pan or other heavy pan on medium high. Sear each rack, starting with the meaty side down, about 3 minutes each side.

Place racks on roasting pan, meaty side up and cook in oven until meat thermometer reads 125° for rare ribs or 130° for medium rare, about 20 minutes.

Serve with roasted vegetables.

Banana Maple Walnut Muffins

22 Dec

I’ve crossed to the dark side and I am never-ever-ever going back. After years of greasing — and subsequently washing — four trays of mini-muffin baking cups (that is 48 — forty-eight, count ’em– little tiny cups each with its own pain-in-the-cuticles little edge that gets full of burnty-bits because, of course, they are also a pain-in-the-cuticles to grease) I finally bought some paper muffin cup liners and I don’t think I’ll ever bake naked again.

Good thing, because this is a nice little recipe that I would like to do again, but might have put it off because of the aforementioned greasing and washing thing.

Full disclosure: Leandro is usually deeply involved in all baking activities. This time, however, he had a friend over and they didn’t feel like it and they were very happy (meaning: not bothering me) so, why eff up a good thing? Also, in retrospect, the many tiny 1/4 teaspoons of this and that really aren’t suited to baking with kids who prefer to throw puffs of flour and baking soda around. So I went ahead and made these myself – his little friend’s mom arriving just in time to help me fill the cups – and had a lovely time.

This was a big hit with my colleagues and everyone else who tried them. Leandro was not so keen (today I seem to have a great deal to disclose, don’t I?), at least he wasn’t at first, but later warmed up to them and loved them in his lunchbox with yogurt for dipping. Oh yes, and the original recipe comes from Food to Live By, by Myra Goodman of Earthbound Farms fame!

Note about the maple syrup: I am pleased to say it comes from New York State! Sugar Brook Maple Farm in Kerhonkson, NY (845-626-3466) to be exact. It is lovely and rich and mellow and thanks to Hatti and Emma for pointing it out to us on our (somewhat) recent visit to her place in New Paltz!

Banana Maple Walnut Muffins

2 Cups flour (mix of whole wheat and white is fine; all whole wheat is too heavy)

1.5 tsp baking powder

¼ tsp baking soda

¼ tsp salt

¼ tsp ground ginger

¼ tsp ground cinnamon

2 large eggs

½ cup pure maple syrup

½ cup firmly packed light brown sugar

1/3 cup whole milk (lowfat is okay)

¼ cup vegetable oil

¼ tsp vanilla extract

2 Cups mashed very ripe bananas (4-5)

¾ Cup walnuts, chopped fairly fine

Position rack in center of the oven and preheat the oven to 375°. Line muffin tins with liners or grease with butter.

Place flour, baking powder, baking soda, salt, ginger and cinnamon in a large bowl and combine well.

Place eggs, maple syrup, brown sugar, milk, oil and vanilla in a medium bowl and whisk to combine well. Add the bananas and stir to combine.

Add the banana mixture to the flour mixture and stir with a rubber spatula until just combined. Fold in the walnuts. Do not overmix or the muffins will be tough. Spoon the batter into the muffin cups, filing almost to the brim.

Bake muffins until golden and a toothpick inserted into the center of one comes out clean (13-15 minutes for mini-muffins; 20 – 30 for standard-size muffins).

Let tins cool on a wire rack for 10 minutes, then remove. They will keep for about three days in an air-tight container. Reheat for 10 seconds in a microwave or 350° oven for 5-10 minutes.

French Chicken in a Pot

20 Dec

In case you were wondering (TW, Donna, Lesly, Trish, and Steve in particular!) what I did with the last two pastured birds from the Restoration Farm Chicken Project…well let me catch you up!

Those new to the blog should know that we participated in a pilot pastured chicken share at our C.S.A. initiated by Trisha Hardgrove. The birds, five in all, were raised out on the farm, grazing and eating organic feed and processed right on-site. They were extraordinarily tasty and the texture was beautiful. So far I’ve done a traditional Asopao de Pollo (Soupy Chicken and Rice), a Rosemary-Lemon Roasted Chicken, and a Tandoori-Style Roast Chicken . My dad did the fourth in a lovely and warming chicken noodle soup, but I don’t have the recipe for that.

For the fifth and final bird of the season I went with another Cook’s Illustrated recipe, with, once again, only the very slightest modifications (a bit more rosemary, for example). The skin wasn’t crispy, but O.M.G. the tender savory chicken and the PAN JUICES. Wow. The secret is the Dutch Oven and not roasting your side vegetables in the same container, as they release a lot of liquid and dilute the chicken juices.

The instructions may look a bit long, but it is really easy – prep and forget. Effortless excellence!

I did oven-fried sweet potatoes separately for this one.

French Chicken in a Pot

You need a 6-quart Dutch oven with tight-fitting lid for this recipe

One 4.5-5 lb chicken, giblets removed

Salt and pepper

1 Tbs olive oil

1 small onion, chopped roughly

1 small rib celery, chopped roughly

6 garlic cloves, peeled and smashed

1 bay leaf

2 sprigs fresh rosemary (if desired)

½ – 2 tsp fresh lemon juice

  1. Place oven rack on lowest position and hear oven to 250°. Pat chicken dry with paper towels, season generously with salt and as much pepper as you see fit. Tuck wings behind back.
  2. On the stovetop, heat oil in Dutch oven over medium heat until just smoking. Add chicken, breast side down; scatter onion, celery, garlic, bay leaf, and (optional) rosemary sprigs around chicken. Cook until breast is lightly browned, about 5 minutes. Using wooden spoon inserted into cavity of bird, flip chicken breast side up and cook another 6-8 minutes, until you get nice browning on chicken and vegetables.
  3. Off heat, cover top of pot tightly with aluminum foil and cover with lid. Transfer pot to oven and cook chicken until breast registers 160° and thighs register 175°.
  4. Transfer chicken to carving board, cover loosely with foil and rest for 20 minutes. Strain chicken juices from pot through a strainer and discard the solids. Let juices settle for 5 minutes , then set over medium heat in a saucepan. Carve chicken, adding additional juices to saucepan. Season with lemon juice and salt and pepper to taste. Serve chicken, with the sauce passed around separately.

Pear, Berry and Goat Cheese Hors d’ouevres ¡Que Chévrere!

16 Dec

Once again, I underestimated how much time I had to make food and how much time each item would take. Regular readers know that I am trying not to fuss when guests come over, but I got a bit ambitious for a Lucas and Amanda playdate and ended up slicing and cooking more than talking for a good part of the early evening.

However, my trip into the weeds of food prep was well worth it, if only for this one new, festive appetizer that looks so pretty and explodes with flavor.

Inspired by a holiday recipe I saw in a magazine last time I went to get my hair done, I picked up some Bosch pears. The original recipe called for Camembert, but I couldn’t find it during my very brave (or ill-advised or just plain crazy?) trip to the nearest Costco Warehouse in the middle of the holiday shopping season with its completely lawless parking lot with a just a half an hour before I had to pick up both little lunatics from the daycare. I cut my losses, grabbed some goat cheese, extricated myself from Costco without incident, and hit the refresh button on my recipe plans.

I had just got the litle guys into a groove at home (which involved unforeseen complications, like my son’s grumpy mood, and taking out the old-fashioned spiral corer and peeler for them to prepare their own apples and other such mommy activities) and Amanda was already at the door! But no harm done – the fizzy stuff was cold and all I had to do was some quick assembly for the starters.

Later I bunged Lucas’ favorite Flex-Mex Shredded Chicken chicken in to a pot and all was well (although admittedly the kids were moaning for food by the time I had it all together – why, why, why do kids decide to get hungry EARLY just when you are overwhelmed? And is there any sound more grating — and distracting — than the whine of your little emperor child when you are trying to concentrate on getting him what he wants anyway? Sheesh!)

So, for the holidays, try this with a dry sparkling wine – we had Frexienet, but I might go with a dry prosecco the next time. Amanda, my colleague, Maryanne, and I loved this up and I think you will too!

Pear, Berry and Goat Cheese Hors d’ouevres (makes a light appetizer for two)

1 Bosch Bear, core removed and sliced into thin wedges (I used a push-down apple core-and-slicer and then sliced each segment in half)

1 tsp lemon juice

2 Tbs creamy goat cheese (chevre)

2 Tbs walnuts, chopped fairly fine

1 Tbs lingonberry jam (raspberry or red currant would also work)

Arrange pear wedges on a plate. Sprinkle with lemon juice to prevent browning. Add a dollop of goat cheese. Top with walnuts and a bit of jam. Serve immediately.

Sage Butter (with Grilled Butternut Squash or Steak)

12 Dec

This is a bang-together butter to dress up a grilled meal. My dad halves butternut squash lengthwise, removes the seeds and grills, skin and all, until tender when pierced. It looks fab and tastes great. Does it need the butter? Well, probably not, but sometimes you just have be generous with yourself and go for the extra unctuous goodness.

Sage Butter

2 Tbs shallots, chopped fine

2 Tbs sage leaves, chopped fine

½ tsp lemon juice

1 stick salted butter, softened (1/4 lb)

Sprinkle of fresh ground black pepper

Spin the shallots and sage together in a food processor (or mince really fine and mix well). Add remaining ingredients and mix well. You may place in a dish and chill, or roll into a tube, wrap in plastic wrap and freeze, cutting off thin disks a needed. Dollop over grilled butternut squash or steak, or slather on bread.

Tostones: Puerto Rican French Fries – Made of Plantains!

8 Dec
If you have ever eyed those oversized, overthick, green banana-looking things in the supermarket and wondered what people do with them, this is your great revelatory moment.

Pre-soaking in salted, garlicky water

Those things are plantains – Musa paradisiaca – a kind of banana we in the Caribbean use to make all manner of delicious, stodgy things, preferably plunged into hot fat and heavily salted. Plantains originated in SouthEast Asia or the Near East or thereabouts and came over with colonialism. They flourish in the tropics and are now integral to the Caribbean culinary canon.

Fry and smash

Tostones – called patacones in other parts of Latin America – are disks that – much like French fries – are sliced and fried twice -once to cook through and the second time to crisp. As the holidays approach and I feel more and more festive, I am saying “Calories be damned, I need some of those!” So I’ve been making tostones for dinner. Yes, the whole meal. And we are all loving it.

Assembly line: note beautiful Pipo Grajales-made tostonera in background

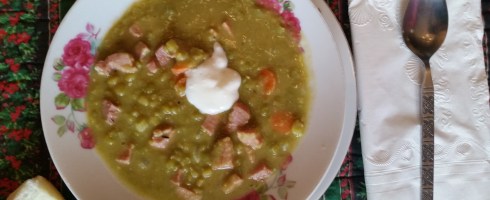
My son dips them in ketchup, my favorite Dominican restaurant serves them with a garlic mojo sauce, and Puerto Ricans like them dipped in mayo-ketchup, a quick stir of mayonnaise and ketchup (that Kraft actually markets on the island!). These days I just sprinkle salt on them; some folk like garlic salt or powdered garlic. Years ago my friend, Chef Patricia Wilson pioneered serving them topped with sour cream and caviar at noted Old San Juan restaurant Amadeus…with a flute of dry sparkling they dress up real nice. You can dip them in hot soup too…mmmmm.

So give tostones a try; the first soak in water is critical; the second one less so, but it doesn’t really add much time to the procedure and it does add flavor and texture, so why not?

 Tostones (Fried green plantains, serves four as a meal, 6-8 as a side)

(Note: you will need two boards or two plates to smush the disks between rounds in the frying pan)

5 green plantains*

3 cloves garlic, peeled and smashed

4 Cups water

2 tsp salt

¾ – 1 Cup vegetable oil (for frying, enough oil to be about ½ inch deep in your chosen frying pot or pan)

Preparing the plantains:  Slice both tips off. With a knife, make lengthwise slits through the peel on two sides. Try not to pierce the flesh too much. Peel the thick skin off.

Stir garlic, water and salt in a bowl. Slice the plantains into ½ inch chunks, on the bias, and place slices in bowl of salted water. Soak for 15 minutes to one hour. Drain on paper towel.

Heat the oil in a heavy pot or pan.  When the oil is shimmering, add as many plantain slices as will fit comfortably. Fry until golden (really golden – not just beige) turning with tongs.

This is where you begin to make an assembly line. Be ready with a couple of plates covered in paper towels for absorbing oil.

Remove and lay the first set on paper towels and place the next round in the hot oil. While the second set is frying, take the first set (the one you’ve already fried) and squash fairly flat in a tostonera, if you’ve got, or between two plates. Dip in the salted water and lay back on the paper towels. You may have another raw set to go (it depends on the size of your fry pot).  Follow the same pattern until all plantain disks are pre-fried until golden, squashed flat, and dipped. Then start returning plantain disks for the final fry to crisp them up. Remove when beginning to brown and lay on clean paper towels until cool enough to eat.

*Look for firm, green, thick skins. As they yellow, they become sweeter and have other uses…

Classic Spanish-Caribbean Black Beans (Frijoles Negros) and Perfect White Rice

4 Dec

I have a four-year-old boy, so you know that toilet humor reigns supreme around here. I don’t particularly like all the burp and fart and poop talk, but I am a pragmatic woman; I try to make my reality work for me and try not to dwell on the way things “should” be.

So, what passes for classic poetry in my house starts out, “Beans, beans, good for your heart…” and you probably know the rest. I have no problem getting Leandro to eat beans several times a week; what preschooler could resist the lure of stinking out family and friends with such jackhammer potency? It goes much the same for asparagus; I reeled him in with the promise of sulphurous-smelling pee and now it’s one of his favorite (of very few) vegetables.

This is perhaps not the most appetizing of ways to introduce a recipe, but I’ll take my chances that you are interested enough in making fast, easy and healthy black beans that taste just as good as whatever you get in your local Cuban joint to overlook the other factors. Or, if you are a boy of any age, perhaps it is just the intro you need to start incorporating more beans into your diet!

(Note: the more often you eat beans, the better your body processes them, so some of the gassy part dissipates over time. And the low-fat, fiber, protein benefits are incredible. They are also cheap, especially if you soak your own*).

Classic Latin Black Beans (Frijoles Negros)

1 Tbs olive oil

1 medium onion, chopped

½ red or green bell or cubanelle – Italian long sweet – pepper (about ¼ Cup), diced

3 cloves garlic, minced

28 oz can black beans, rinsed and drained (4 Cups if using dried*)

½ Cup water (you can add more as needed)

1-2 stock cubes (vegetarian vegetable is fine; I use Knorr chicken)

1 Tbs dry oregano (or 1.5 fresh)

1 tbs cider vinegar (optional)

Heat olive oil in a heavy soup pot at medium high until fragrant. Add onion and peppers and stir to coat. Lower heat and cook until softened, about five minutes. Add garlic, stir to coat and cook another minute. Add remaining ingredients. Bring to a boil, then cover and lower heat to simmer, about 15 minutes. Serve with white rice (recipe below).

*Soaking dried beans: Rinse a pound of beans (from a store that seems to move a lot of dried beans – one of the problems is that if the beans are old, they will never soften up nicely), soak them in two quarts water overnight. Change the water in the morning and in the evening rinse and change water. Simmer them for two hours and holy legumes, Batman: 1.5 quarts of beans to play with.And talk about cheap: a pound of dried beans costs about the same as a 15.5 oz can of them and you choose how much sodium you want with it.


Perfect White Rice (you can halve this recipe if you are not big into carbs)

1 Tbs olive oil

2 Cups long-grain white rice (Sello Rojo, Goya or other Latin brand preferred)

4 Cups water

½ tsp salt

Place olive oil in a medium pot (with a tight lid). Begin heating to high while adding the rice. Stir to coat, Add water and salt. Stir once, then bring to a boil. Lower heat to medium and allow water to evaporate until it goes below the surface of the rice and there are a couple of holes in the surface. Turn rice over once with a big spoon. Cover and cook on low another ten minutes. Fluff with a fork and serve.

Split Pea and Ham Soup (so dense, so smoky, so easy)

1 Dec

A Ruined Gravy, but Still Successful Turkey Stock (pre- or post-roast)

29 Nov

True confessions from Thanksgiving? I screwed up the gravy. Yes, I did.

I forgot to leave out the liver when simmering the stock and suddenly, as everything was going ever so well, Leandro having helped me assemble the ingredients and snip the thyme from our little container outside and put everything together…I smelt it. We went from that fragrant poultry and herb simmering gorgeousness to a deep, ugly pungency that for someone with a liver aversion, someone like me, who feels ill with just a whiff of the awful offal, well, that smells like disaster.

I dumped lock, stock and barrel, opened the windows and managed to salvage something resembling gravy from just the juices of the roast turkey (all available stock having been used up for other dishes), but it was so damn salty it could only be used drop by drop and I didn’t have time to thin it. Perhaps worse than the stock — and therefore gravy — failure on my part, my mom got to use the packet of powdered s**t that she bought just in case I should eff it up (to her credit, she didn’t gloat very much over saving the day).

Those of you out there who are really from-scratch foodies will feel my pain, will understand that the handy envelope is evil like heroin, that it feels even worse than resorting to the drive-thru Happy Meal with the toy because you are just not a good enough parent to stand another minute of whinging child in the back seat….that it is — if not rock-bottom — somewhere pretty deep to go.

But, nevermind – everything else  — the bird, the veg, the potatoes…the stuffing! — was delicious and joyous and I let it go…pretty much. I focused on the future, because not only does Thanksgiving return the next year so you get  to try again (and make different mistakes), but also, alleluyah, the roasted carcass of that delicious bird offers possibilities for redemption.

So here is my normally very successful stock recipe. You can make it when you’ve got the turkey neck and giblets (LEAVE THE LIVER OUT, PLEASE!!! – Do as I say, not as I do) while the turkey is roasting (or the night before without distractions, which is what I should have done) or use the carcass after (which is what I did, just fine!). Or both!


Dots of gravy - more point of honor than glory

Turkey Stock

(from Thanksgiving roasted carcass OR turkey neck and giblets)

1 post-roasted turkey carcass, usable meat removed and carcass separated into pieces

OR at least one turkey neck and giblets (EXCEPT liver)

8 whole black peppercorns

3 sprigs thyme

3 sprigs parsley

1 onion, peeled and spiked with two cloves

3 cloves garlic, peeled and smashed

Place all ingredients in a large pot with enough water to cover (2 quarts). Bring to a boil, scooping off foam. Reduce heat and simmer until water is reduced by at least half. (I usually leave it at least an hour). Strain through a sieve into a container that will let you scoop off fat when the stock cools and the fat rises to the top. Use to make gravy or store for another dish. Will keep several days in the fridge; three months in the freezer.