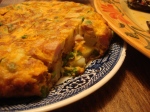
Archive | Uncategorized RSS feed for this section

Snap and Go Asparagus (fast and fun)

4 Jan

I dared to go off-season this week and it was well worth it.

When Spring rolls around I am on the phone to the local North Fork farms to find out exactly when they will be harvesting asparagus. There is nothing, nothing, nothing  better than the sweet, buttery green-ness of fresh-from-the-earth asparagus. I eat it for the six weeks of May and June that it is harvested (nevermind the odd smell of bathroom visits! More on that later), raw, steamed, sauteed, roasted…however.

However, it is not Spring right now! Asparagus may be in season somewhere, but not in my grow Zone.

Usually I stick to our local seasons, but the bunches of asparagus at one of the local grocery stores just looked so good that I got a craving that virtue could not curb. Hey, it’s been a tough holiday and virtue doesn’t seem to be handing out its own rewards at the moment. What the imported stuff lacked in farm-to-table zest, I made up for in garlic.

At $3.99 a lb, you might not find asparagus cheap (especially when you snap a third off the bottom!). Asparagus (which is a member of the lily family) tends to be expensive because it has to be harvested by hand. But it is certainly easy to prepare, and made for a speedy yet chic snack for me and my friend Jamie on a recent playdate (during which the kids ate – you guessed it – pizza). 

Please note, you can look very sexy nibbling asparagus if you let yourself go a bit. For that purpose, and for this barely-cooked recipe, I recommend the skinny asparagus over the fat.

Snap and Go Garlic Asparagus

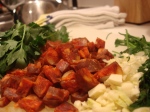
1 bunch fresh asparagus (about a pound), rinsed and trimmed*

1-2 Tbs olive oil

2-3 cloves garlic, peeled and chopped, not too fine

salt for sprinkling

Heat the oil in a large skillet at medium heat until fragrant. Toss in the garlic, turn to coat, sauté an additional minute, then toss in the asparagus. Stir to coat then allow to cook for 5-10 minutes (the fresher and thinner the shorter the cook time). You can test them after five minutes by trying a stalk. You just want it tender and warm, but not mushy. Sprinkle with salt, and serve.

*Prepping the asparagus is fast and easy, but requires some explaining:

Rinse the stalks. Take one stalk and snap off from the bottom; there will be a natural break (sometimes it’s as far as a third of the way up!), which will scare you because you have spent money on this asparagus, dadgummit! The point, however, is that the stalks can be woody (especially if it is not-so-fresh) and the woodiness creeps up from the bottom. Some people use that first stalk as a measure and use a knife to trim all the rest. I snap each one. Discard the bottoms. Dry the remaining stalks.

(I often use this as a side dish to eggs or steak, but will also just do a pan and eat it with my fingers, as Jamie and I did on Sunday. Delicious and dead simple).

Fun science notes: Now, about the asparagus and urine connection. Apparently some people detect a sulfurous odor in their pee after eating asparagus (I definitely do) and others don’t. The jury is still out on whether that is because some people don’t produce the odor or they just can’t smell the difference. According to some of my online searches, Ben Franklin found the odor disagreeable, while Marcel Proust thought it rather fragrant (so the differences of olfactory opinion between the Yanks and the Franks go waaaaay back and waaaaay deep). At any rate, the odiferous asparagus mystery raises interesting questions about human digestion and sense of smell in general and may hold the key to greater understanding of what the nose knows and why.

Tapas 4: Clams and Chorizo: keeping the salt at bay (haha!)

27 Dec

Clams and chorizo are delicious, gorgeous, easy  and lightning-fast to make, but be forewarned: the brine in the clams is so strong that the dish often turns out too, too salty.

I think I am going to start throwing peeled raw potatoes into the brine to soak up some of the salt; the flavors of this dish also harmonize with garbanzos (chick peas/ceci) so I may try adding a low-sodium can of those.  Kate from England suggests soaking clams in milk, but I usually use the clams in the shell…Any other suggestions are welcome!

Have a lot of good crusty bread available

Clams & Chorizo

3 TBs olive oil

4 cloves garlic, minced

¼ lb chorizo, peeled and coarsely chopped

¾ Cup dry white wine

2 lbs small clams in shells (or cockles or a mix) scrubbed

1 tsp parsley, chopped

Make sure you have tongs handy!

In a large pot, heat oil then briefly sauté garlic (do not brown). Add chorizo and sauté briefly, just until the oil begins to color. Add wine and bring to a boil. (This is where I think I’ll add garbanzos or potatoes in the future) Add clams and cover, then after a couple of minutes, open pot and begin to pull clams out with tongs as they open (they will get chewy if allowed to overcook even by seconds!). Put them in a serving dish with sides. If using potatoes, cook at low heat until they become tender. Stir parsley into the cooking liquid then pour over clams and serve (shells on) with crusty bread.

Party Snacks: Tortilla Torcal, a Spanish egg frittata with chorizo and ham

21 Dec

Today I lived my owned sour grapes fable. You remember: the Aesop story about the fox who can’t reach a bunch of grapes that are taunting him from a high vine. In the end, the fox gives up and consoles himself by saying, “Those grapes were probably sour anyway.”

Well, the tortilla flipper is probably overrated anyway.

Like the fox, I won’t find out whether this wondrous invention is as tasty as it looked on the online pages of a Spanish product vendor. It looks like two skillets hinged together that make flipping a classic Spanish tortilla (savory stovetop egg pie) easy. Like, you won’t burn your forearms as you upturn the eight not-quite-cooked eggs onto a plate and then slide the tortilla back into the skillet and you won’t make a goeey, cementy, eggy mess as the uncooked bits goop out of the skillet…

Nah, what would be the fun of that? Why take a muscle-y, down and dirty, daredevil sacrifice for the sake of food and turn it into a clinical, tidy, bloodless, soul-less operation?

Never. Not even if I could spare $50 to purchase another piece of kitchen equipment I have no room for.

So, screw the tortilla flipper. Or unscrew it. Or unhinge it. Forget it.

The tortilla itself, however, is a worthwhile enterprise. This is a case where the “easy” in “Hot, Cheap & Easy” is relative. A relative lie, actually. Making a Spanish tortilla takes time, patience, some strength and a set of stones. However, when you make a good one, your guests will lavish you with praise, something I am quite fond of.

And since I can make it the night before an event, it’s handy and portable.

The classic tortilla española is potato and egg, but this one, inspired by Penelope Casas’ recipe for Tortilla Torcal in her book Tapas makes it a mightier, spicier dish that really dresses up a tapas night.

Tortilla con chorizo y petit pois

1/2 cup olive oil

3 medium potatoes, peeled and cubed

8-10 eggs

1/4 tsp salt (optional, reduce or leave out if the ham is very salty)

1 small onion, chopped fine

1/4 lb. spicy Spanish-style chorizo sausage, peeled and diced

1/4 Cup ham steak or other cured/fully cooked ham, diced

1/4 Cup frozen peas, cooked


Heat the oil in a skillet and add potatoes, lower heat and cook potatoes slowly, turning frequently. When they start to brown, they are more than done. In a large bowl, beat the eggs lightly with the salt. Drain the potatoes, reserving the oil. Add the potatoes to the egg mixture and mix just barely (this gets the temperatures even).

Heat one tablespoon of oil to the skillet and sauté the onion until tender. Add the chorizo and the ham and cook just until the chorizo begins to release its oil (it will get bitter if allowed to cook more). Add the peas and cook for another few minutes. Stir very gently into the eggs and let sit for at least five minutes. Meanwhile, make sure your skillet (9” or 10” made of a material that is not too heavy!) is really clean, then heat two more tablespoons of oil and pour in the egg mixture. When you see the egg begin to cook on the edges, lower heat to medium low and cover. Allow to cook for ten minutes, until the center is thickened.

This is where it gets challenging. Get a plate that will fit smoothly to the edges of the skillet. The plate should be flat-surfaced, with no changes in levels. Take the skillet to the sink, put the plate on top and, with your hand firmly on the plate, turn the skillet over so the tortilla turns onto the plate (this is where the goo can scald your forearm, if you are unlucky or not careful). Then slide the tortilla back into the skillet, wet side down. Put back on heat and cover, continuing to cook until done (another five minutes or so). In the meantime, wash and dry the plate. When the tortilla is done, flip it back onto the plate and behold its golden loveliness.  

Allow to cool (I actually refrigerate overnight after it cools, wrapping in foil or plastic wrap or both). Serve at room temperature, or warm; it’s good at any temperature. I usually cut into squares for a tapas party and stick the squares with toothpicks to get people started.

 NB: Penelope Casas and other Spaniards prefer their tortillas a bit juicy inside. I find that Americans are too concerned about salmonella for that (and probably rightly so), so I cook it through. If you know your egg source, you should be fine cooking it rare!

Also, I really, truly thought the tortilla flipper was cool, but I think I am way cooler for doing it Old School. Sour grapes? You make the call.

Tapas, interrupted, to do some baking with the boy!

19 Dec

I have said I am not much of a baker, but I got inspired to try with my niece, the incomparable Sofia, when she was little, figuring kids will love to cook if they can make their own desserts. It was good fun.

Now I bake pretty often with my own son, Leandro. You have to be ready for a bit of a floury, batter-splattered mess, for tussles over the right time to help, for wandering attention. The pay-off is a delicious-smelling house, not-too-sweet treats for the week and, I hope, a kid who knows his way around a kitchen in the future.

And, of course, the blessing of achieving something together (and not planting him in front of the T.V. in order to get something done).

We most often make mini-muffins – four trays of 12 will suffice for a standard 12-muffin recipe. Then we have 48 little muffins which we divide and deliver to various neighbors and friends (he is very proud to tell people, “I made these for you.”) and I pack three at a time in his lunch box. I also pack three at a time in my own gob, but nevermind…The downside of mini-muffins is washing the tins by hand. Let them soak first!

Here’s our simplest, entry-level recipe for banana muffins. See notes for baking with kids at the end!

Basic Banana Muffins

6-ish overripe bananas

¾ Cups sugar (regular or light brown are fine)

1 egg, lightly beaten

1 tsp baking soda

½ tsp salt

1.5 Cups unbleached white flour

1/3 Cup (5 and 1/3 Tbsp) melted butter

Preheat oven to 400°. Mash bananas in a big bowl (they don’t have to be smooth). Add sugar and egg. Add the melted butter (not too hot, or there will be lumps when it hits the cold batter). Separately, combine the dry ingredients, then add to banana mixture and combine until thoroughly wet and then stop! Spoon into greased muffin tins. Bake for 12 minutes (15 minutes for regular size). Makes 48 minis; 12 regular. Will keep for three days out of fridge, a week in.

NB: 1. Lay out all your ingredients and equipment before calling the kids to help! 2. Grease muffin tins before getting started. 3. Aprons are a very good idea. 4. This is the time to remind them about thorough hand-washing and no coughing into the batter! 5. By all means let the little ones try to spoon the batter into the tins. It will be a mess, I promise you, but the muffins come out fine and it does wonders for their fine motor skills, their concentration and their feeling of accomplishment.

On bananas: Keep a ziploc bag in the freezer for overripe bananas or bananas that don’t get finished (trimming off the bit end, of course). DO peel them first. When you have six or thereabouts, you are ready to make bananas muffins!

Tapas 2: The Best Mussels EVER (party snacks to make ahead!)

18 Dec

Mejillones a la vinagreta must be made the night before and then assembled just before serving. Enlist the help of your guests – those lovely kitchen elves who want to keep busy while watching you cook.

I love seafood and I especially love mussels. And I especially, especially love mussel dishes that force people to use their hands and slurp – there is no better ice breaker than perilous food, particularly if eaten standing up while simultaneously holding a beverage. Conversation among complete strangers is virtually guaranteed.

Also, mussels are simple. You just need to pull them out of the pot as soon as they open (so babysitting the cooking is required on this one for about ten minutes) so they don’t get chewy. This means TONGS are crucial (although I have been known to use my fingers to pluck them out in extremis).

These mussels are inspired by Spanish cuisine maven Penelope Casas. You make them the night before and then dish them into the reserved shells before serving. Crusty bread for dipping is critical.

Mussels (Mejillones) a la Vinagreta

1/2 cup olive oil

3 Tbsp red wine vinegar

heaping Tbs small capers

2 Tbsp minced red onion

1 Tbs minced pimiento (I prefer roasted red peppers, but I inadvertently bought sweet red peppers in a jar and the resulting tanginess worked out just fine)

1 Tbs minced parsley

pinch of salt and a grinding of black pepper

2-4 lbs mussels in their shells*

1 slice lemon

Whisk the oil and vinegar together, then add the capers, onion, peppers, parsley, salt and pepper. Put the mix into a large freezer bag (if you need this dish to be portable)

Boil one cup of water in a big pot with the lemon slice. Add the mussels and bring to a boil, covered. Pluck out the mussels when they open (waiting until the meat separates completely from the shell into a little sausage shape and then pulling out immediately) and put in a separate bowl to cool. Discard any mussels that do not open after ten minutes. Remove the mussel meat and put into plastic bag with the seasonings and refrigerate.

Save half the mussels shells and clean well (this is the tedious part; make sure you have good music on). Put in a plastic bag and refrigerate.

To serve the next day, arrange shells on an attractive and large platter and put one mussel in each. Spoon the remaining seasoning over each.

Serve with a dry sparkling white (like Spanish cava or prosecco – your more economical options) or a sauvignon blanc from New Zealand, or if you are lucky/geographically able, a Long Island sauvignon blanc from Paumanok or Jamesport Vineyards.

*NB: Mussels should be bought the day of or the day before making. Buy them in net bags (not wrapped in plastic) from a reputable vendor who moves a lot of product and SNIFF THEM! If they smell faintly briny and sweet, they are good. If they smell funky or of ammonia or anything that makes you wonder, then don’t buy them! Do not be afraid to ask for a different bag after sniffing; a fishmonger will only respect you the more for knowing your shellfish.

At home, store in a nonreactive bowl in the fridge, covered with a damp towel.

These days mussels from stores are pretty clean. You must still wash them in cold water and tug out any weirdy-beardies sticking out from the shell. While you wash, discard any mussels that are cracked or are open and won’t close back up if pressed together.

Tapas 1: make your own mayo

17 Dec

This is the first in a bunch of posts about an evening of tapas, the Spanish snacks. On a recent evening I made tapas for some dear friends out in Greenport (an annual event) and you need to know how to do it too. It is an elegant yet friendly way to spend a long time at the table, eating and drinking in a leisurely fashion. The recipes are easy, but some can be time-consuming (I said hot, cheap and easy, but I didn’t say fast!) especially when you want to make several dishes. So choose things you can make ahead and serve cold or at room temp.

First off, make your own mayonnaise! It is lighter, creamier and fresher than what you buy in the store, doesn’t contain preservatives or other weird ingredients (it’ll keep for about a week in the fridge) and you can flavor it with garlic or herbs.

Homemade Mayo (with garlic mayo option)

2 yolks from fresh eggs

(2 cloves garlic, peeled and chopped, optional)

2 tsp lemon juice (or vinegar, if you must)

(1/4 tsp mustard powder, optional) 

pinch salt, grating of pepper

1 1/2 Cups light or extra-light olive oil (you can use different oils to achieve different flavors, but for basic mayo, light olive oils work best. I find regular olive oil too overpowering)

2 Tbsp warm water

Put the egg yolks, (garlic), lemon juice, (mustard), salt and pepper in a food processor or blender and buzz for a bit. Then leave the motor running and pour the oil in through the top in a very thin stream (I like having help for this part) and the mixture will get nice and thick. Add the warm water at the end.

Some people actually beat their own mayo; if you are so inclined, then do NOT use an aluminum bowl – it will turn the emulsion gray.

I like this slathered on tortillas (recipe to come), boiled potatoes, seasoned shrimp, in sandwiches…every which way you might use mayo or tartar sauce.

Cool science: Mayonnaise is an “emulsion” or a blend of two unlike things, in this case, oil and lemon juice (liquid). The egg yolks contain lecithin and that is the element that holds this fragile union together. Without it, you would have separation, just like in salad dressing. The reasoning behind fresh eggs is not just about food poisoning; the fresher the eggs, the more potent the lecithin and therefore the better your mayo.

Red Wine and Box Brownies Re-Thunk

5 Dec

On Friday night, I was cool for the first time in a very long time.

On Saturday I landed back on earth with a resounding THUNK.

Seminal post-punk eighties band Killing Joke was playing Irving Plaza and I happen to be a buddy of its drummer, Paul Ferguson and his wife, Olga.

So my folks stepped in with babysitting and I actually got on a train by myself to Manhattan and did the whole VIP- backstage thing at the incredibly hard-driving concert with friends and didn’t get home until around 3 am! Fortunately I had chosen Guinness as my stick-to beverage and so on Saturday, despite having onlyabout 3.5 hours of sleep, I was doing relatively well.

Maqui, Natalia and Paul backstage - while I was still cool

Then, as we were preparing to go to a birthday party on Saturday evening, there was an awful scream from the living room. Mommy ears told me immediately that this was not your run-of-the-mill attention-getting moaning over a one of those minor bumps that occur 17 times a day to an active boy-toddler.

And yes indeed, Leandro had slipped, banged his chin and bit his tongue. Hard. 

So we spent the rest of the evening – from 8:30 to about 11 p.m. at the emergency room, mopping up blood and spit and getting him stitched up. He’ll be okay, despite the sad fact that I cannot remove the hurt and suffer it for him. Heavy sigh.

Where this intersects with food is that part of the interrupted party prep was baking some brownies to take. I am not much of a baker (Following directions and doing things with precision are not my talents) and every brownie recipe I have seen looks daunting. So Leandro and I ripped open a packet of Ghirardelli’s Triple Chocolate stirred it around with an egg, some oil and water and popped it in the oven. We pulled it out just before leaving for the hospital.

Now, my wine-snob self would’ve told you that chocolate and red wine isn’t a good flavor combination at all. That chocolate robs the wine of all the sugar on the palate and ruins the wine’s balance and flavor.

But, after a long night in emergency trying to calm a hurting toddler who means more to me than anything else in the world…I’m tired and drained and worried and finally relaxing because he is asleep and resting…give me the damn brownies and pour me another glass of red – what an exactly, precisely, perfectly harmonious combination indeed!

I hope Leandro will recover soon enough to have some brownies too!

Festive in a Flash – Fab Accessories for Workhorse Recipes

28 Nov

My favorite quick dress-up for food that takes me from workaday-dull to bright and shiny: dried cranberries and walnuts.

My take-to-work breakfast? Plain nonfat yogurt, swirled up with some honey, a handful of cranberries and another handful of walnuts (bought in big bags at Costco – they last and last). Crunchy, creamy and sweet – oh yeah.

At home, I add them to spike up instant oatmeal. I also substitute half the raisins in oatmeal raisin cookies with cranberries for a brighter flavor and add walnuts for crunch and depth.

Boring salad? Add handfuls of cranberries and walnuts and make it fancy-schmancy (especially good with orange/clementine segments, red onion and feta – separately or in combination).

Today I incorporated them into my leftover turkey salad. Zippy!

Leftover Turkey Salad

leftover turkey, removed from bone, gristly bits removed, and chopped into small squares (2-3 cups)

handful dried cranberries

handful chopped walnuts

one celery stalk, chopped fine (mostly because I don’t really like celery)

half a red onion, finely chopped

4 -5 Tbs mayo and nonfat plain yogurt in whatever ratio you prefer

1 Tbs brown or yellow mustard

Mix all together in a bowl and serve in sandwiches or over salad.

Notes: Cranberries (Vaccinium macrocarpon), blueberries and Concord grapes, are the only commercially-grown native North American fruits! They are loaded with vitamin C and dietary fiber and manganese and other good things and may very well help prevent some urinary tract infections in women, but the jury is still out on that.

Breakfast at Tiffa..no, at 65mph

28 Nov

In a perfect world we would sit together over a lovely meal of toast and fruit and yogurt, maybe eggs, smoked salmon, cheese. But no.

My less-than-perfect world is manageable in part because I concede to my son having breakfast in the car at 6:45 a.m. (well, more like 7, cause I am always running later than I mean to) on the way to daycare and work.

The result is less-than-satisfying (not least because my car is a bio-hazard and we should be wearing hazmat suits while in it), but he eats and I get to listen to the news in relative peace.

I know that cereal bars are considered a fair option in many circles, but have you read the labels? High fructose corn syrup, sugar, dextrose…might as well hand him the Chips Ahoy. And he’ll get cereal bars at school anyway, about which I just shut my mouth.

He might have buttered toast (I buy fresh-baked multi-grain at the Fairway – they slice it and I freeze it; or one of those sprouted grain loaves that actually come frozen), but I also have another trick – we call them mini-pizzas (marketing is everything).

Here’s what I do:

Portable Mini-Pizzas

3-4 Wasa Crisp and Light crackers

slices of cheddar or Monterey jack

Top the crackers with the sliced cheese. Bung into the microwave for 13-15 seconds. Slice into squares. Put in a plastic thingy and serve once we are strapped in the car.

NOTE: Usually he eats the slightly melty cheese and hands the crackers to me on the Southern State during Morning Edition. He’s got a juice and water mixed drink and grapes (when I am not paranoid about sudden choking on the parkway) or a peeled apple. It ain’t the I-Hop, but I won’t pay their prices anyway.

Fabulous Five-Minute Black Beans

24 Nov

A rocking go-to recipe, with Latin flair and yes, a short-cut. I admit it; I use a stock cube in this one. So sue me.


These beans are as fast as anything I make….and really tasty

1/2 Tbs olive oil

One small onion, chopped

(optional – chopped red or green pepper; if I have end bits that need to be used, I chop ’em up and put them in too)

one 15 oz. can black beans, rinsed and drained

half a chicken bouillion cube (the whole thing, if the beans are low sodium)

Heat oil in a small pot on medium high. Add onions, stir, then lower heat to allow to soften. Add beans, 1/4 can water and stock cube and simmer up until the rice is ready. Serve over rice. Or roll up in your favorite wrap with some cheese.

Yup, that simple. We have it as a meal or a side here. And I find that, mixed with rice, it reheats wonderfully for our packed lunches…